Autochords for iPhone and iPad
User Guide (v5)
Thanks for checking out Autochords! This guide will help you if you’re feeling stuck.
Many of the app’s features are free to use, but some require an in-app purchase.
Contents
- Finding a chord progression
- Learn how to play chords
- Playing the progression
- Accessing the settings screen
- Changing tempo (Requires PRO)
- Adding favorites (Requires PRO)
- Managing favorites (Requires PRO)
- Creating a custom progression (Requires PRO)
- Managing custom progressions (Requires PRO)
- Exporting to MIDI (Requires PRO)
- FAQs
Finding a chord progression
On the main screen, select the progression picker dropdown.
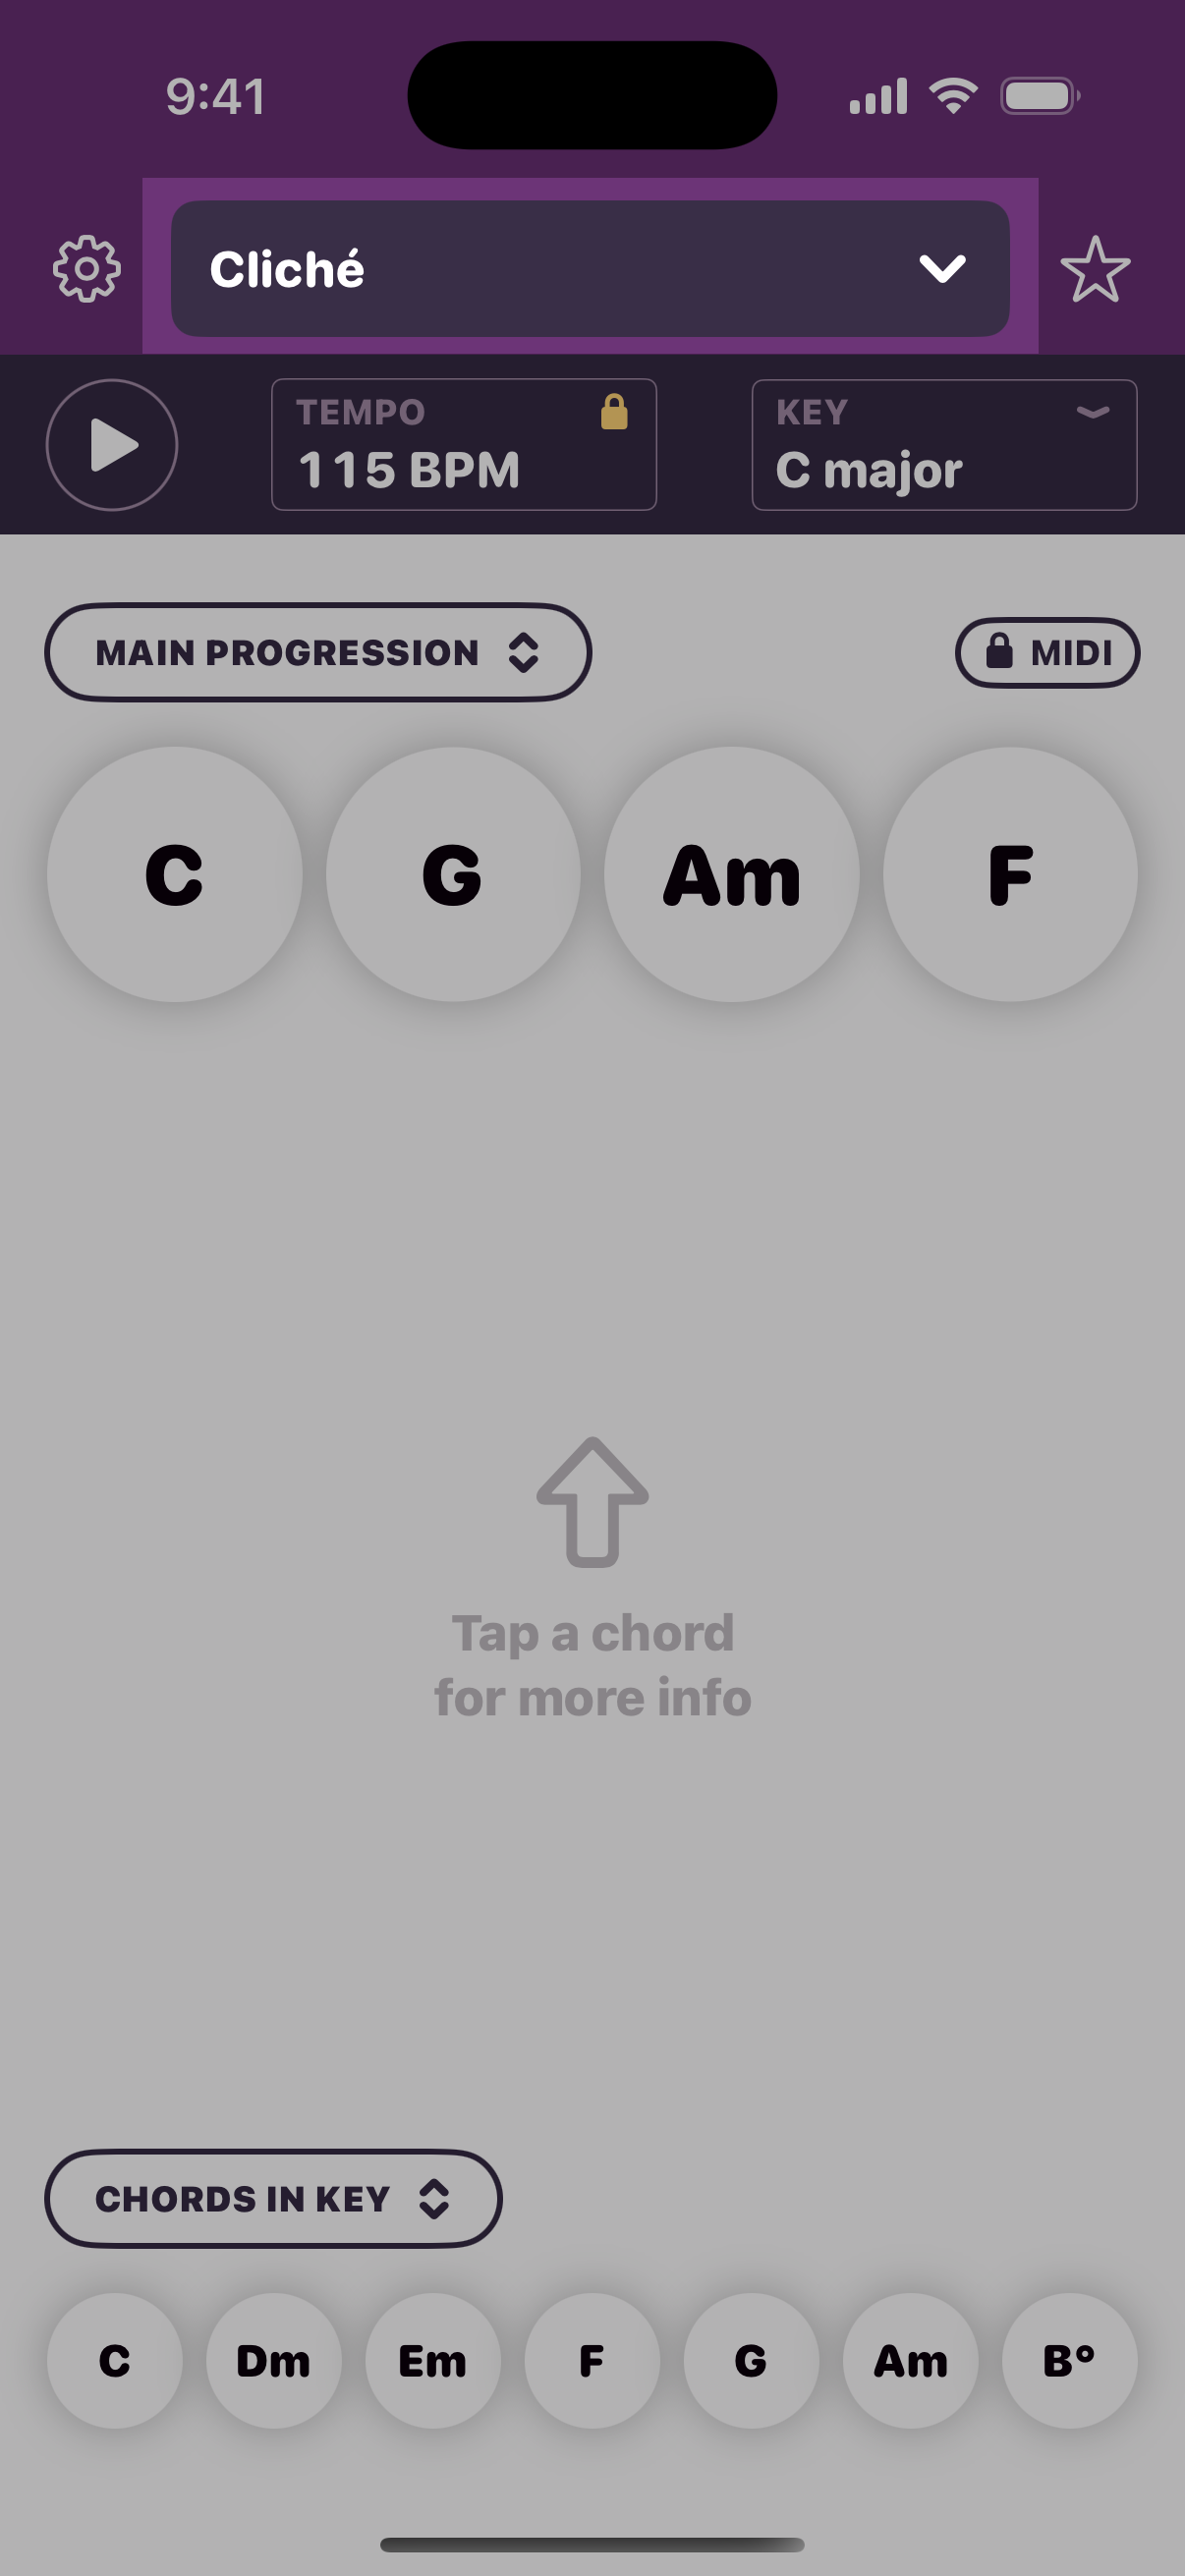
The tab labelled “built-in” on the presented sheet offers dozens of chord progressions to suit many styles of western music. The roman numerals (e.g. I V vi IV) represent the progression’s steps relative to its key.
Browse through the progressions and pick one that speaks to you. If you’re having trouble deciding, try the “shuffle” 🔀 button to have one picked at random.
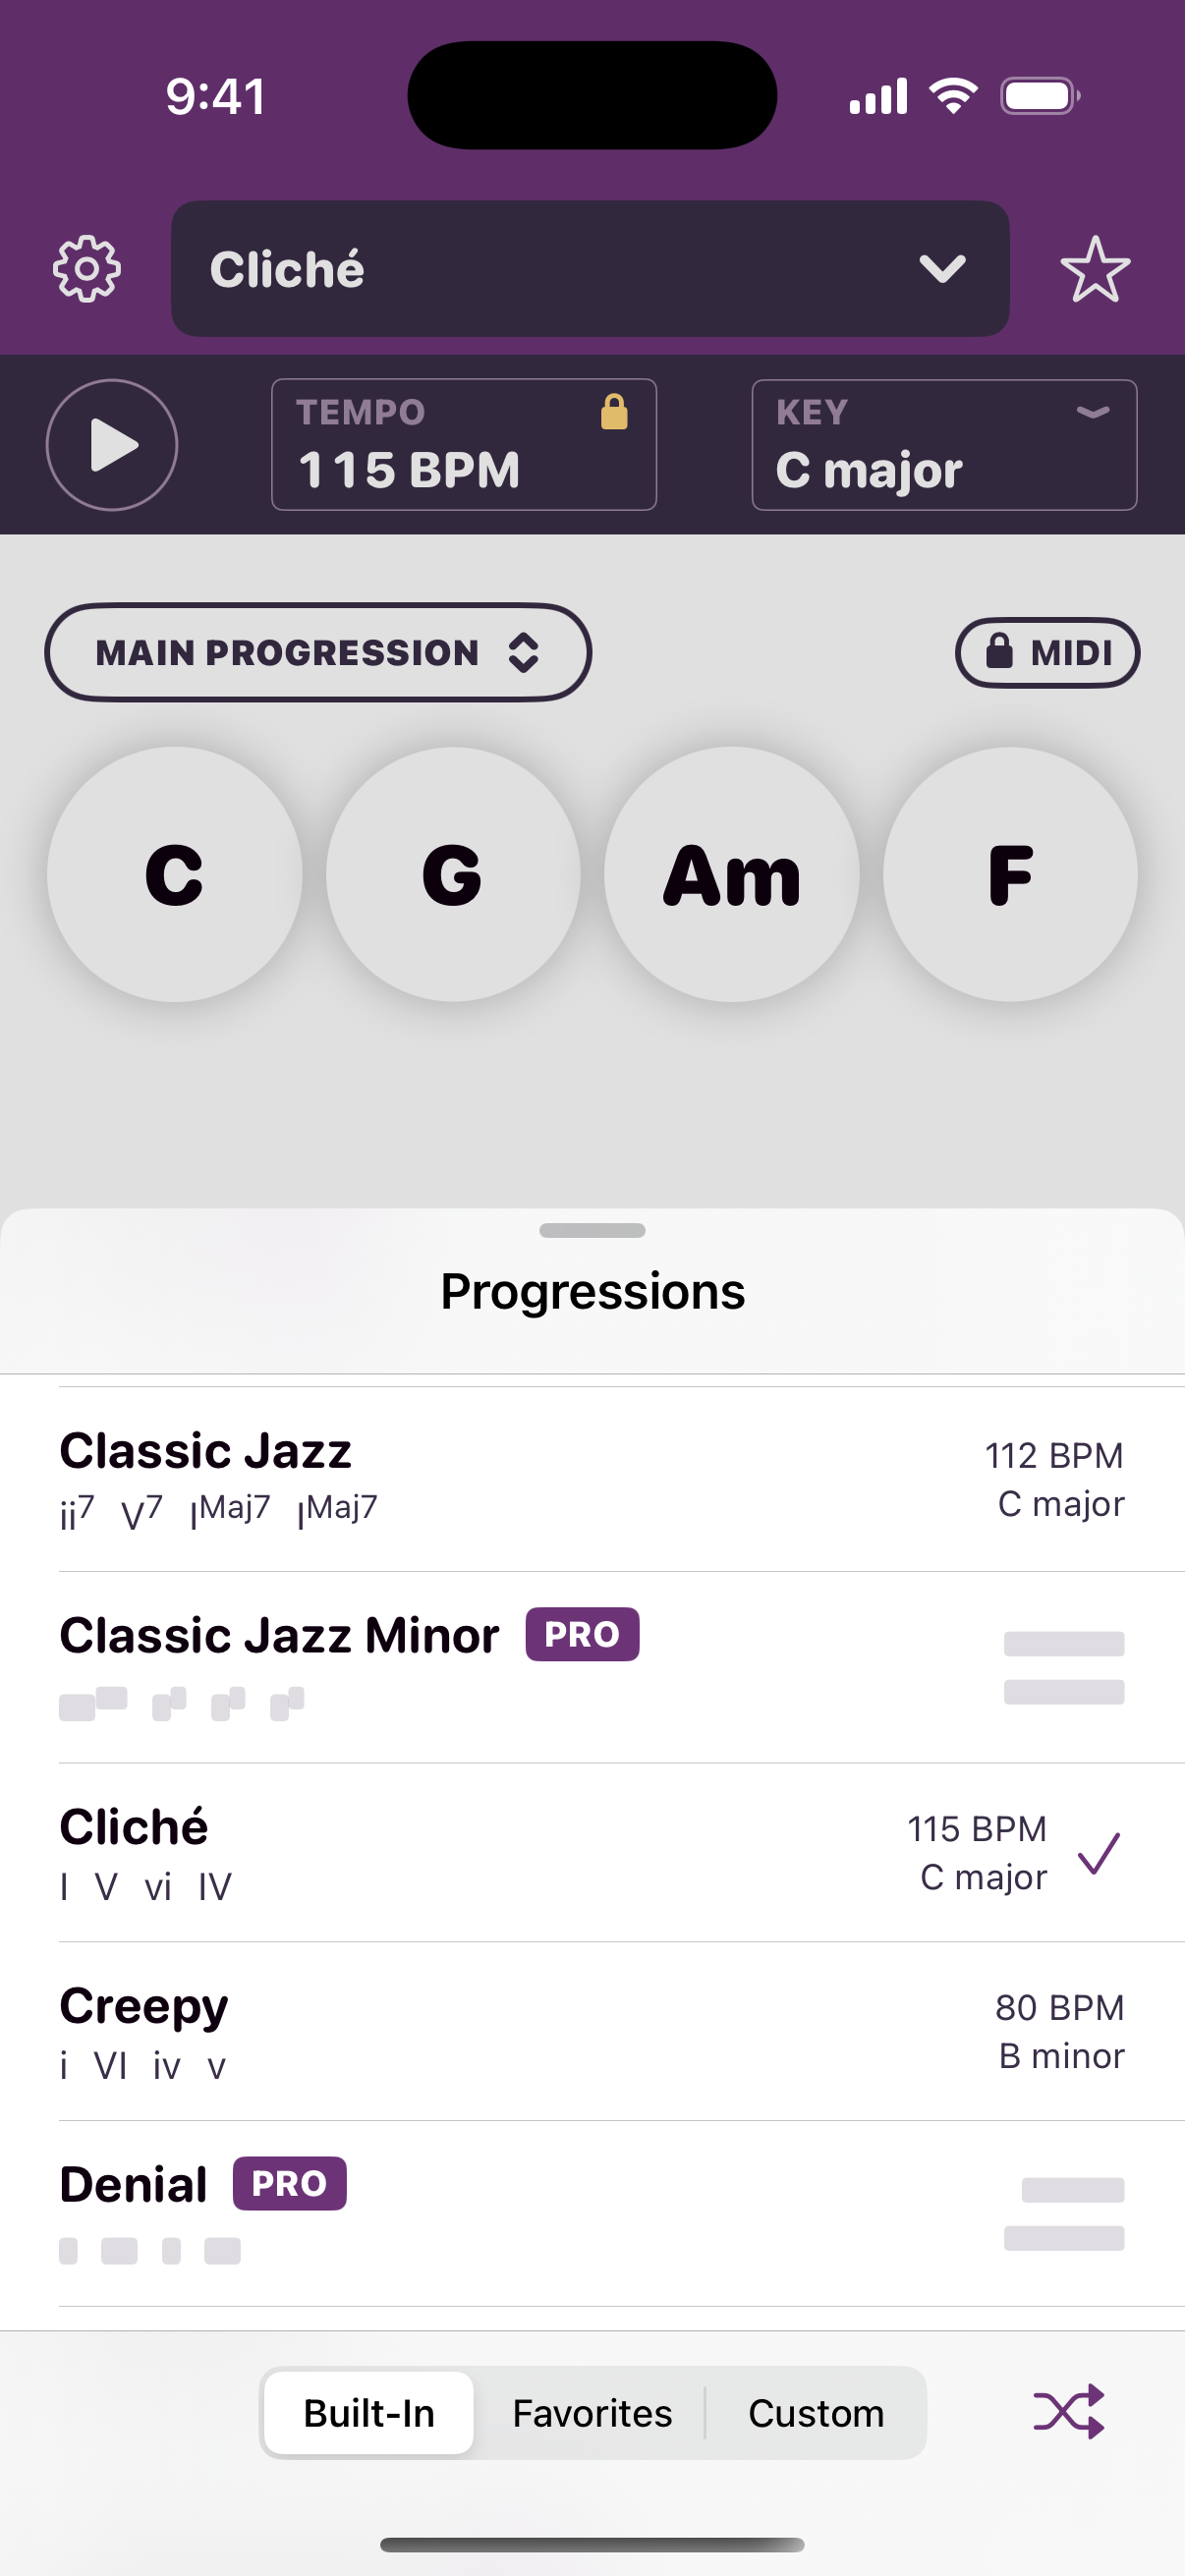
Note: If you haven’t unlocked the PRO in-app purchase, some progressions will be unavailable.
Tap outside of the sheet or swipe it down to dismiss it.
Learn how to play chords
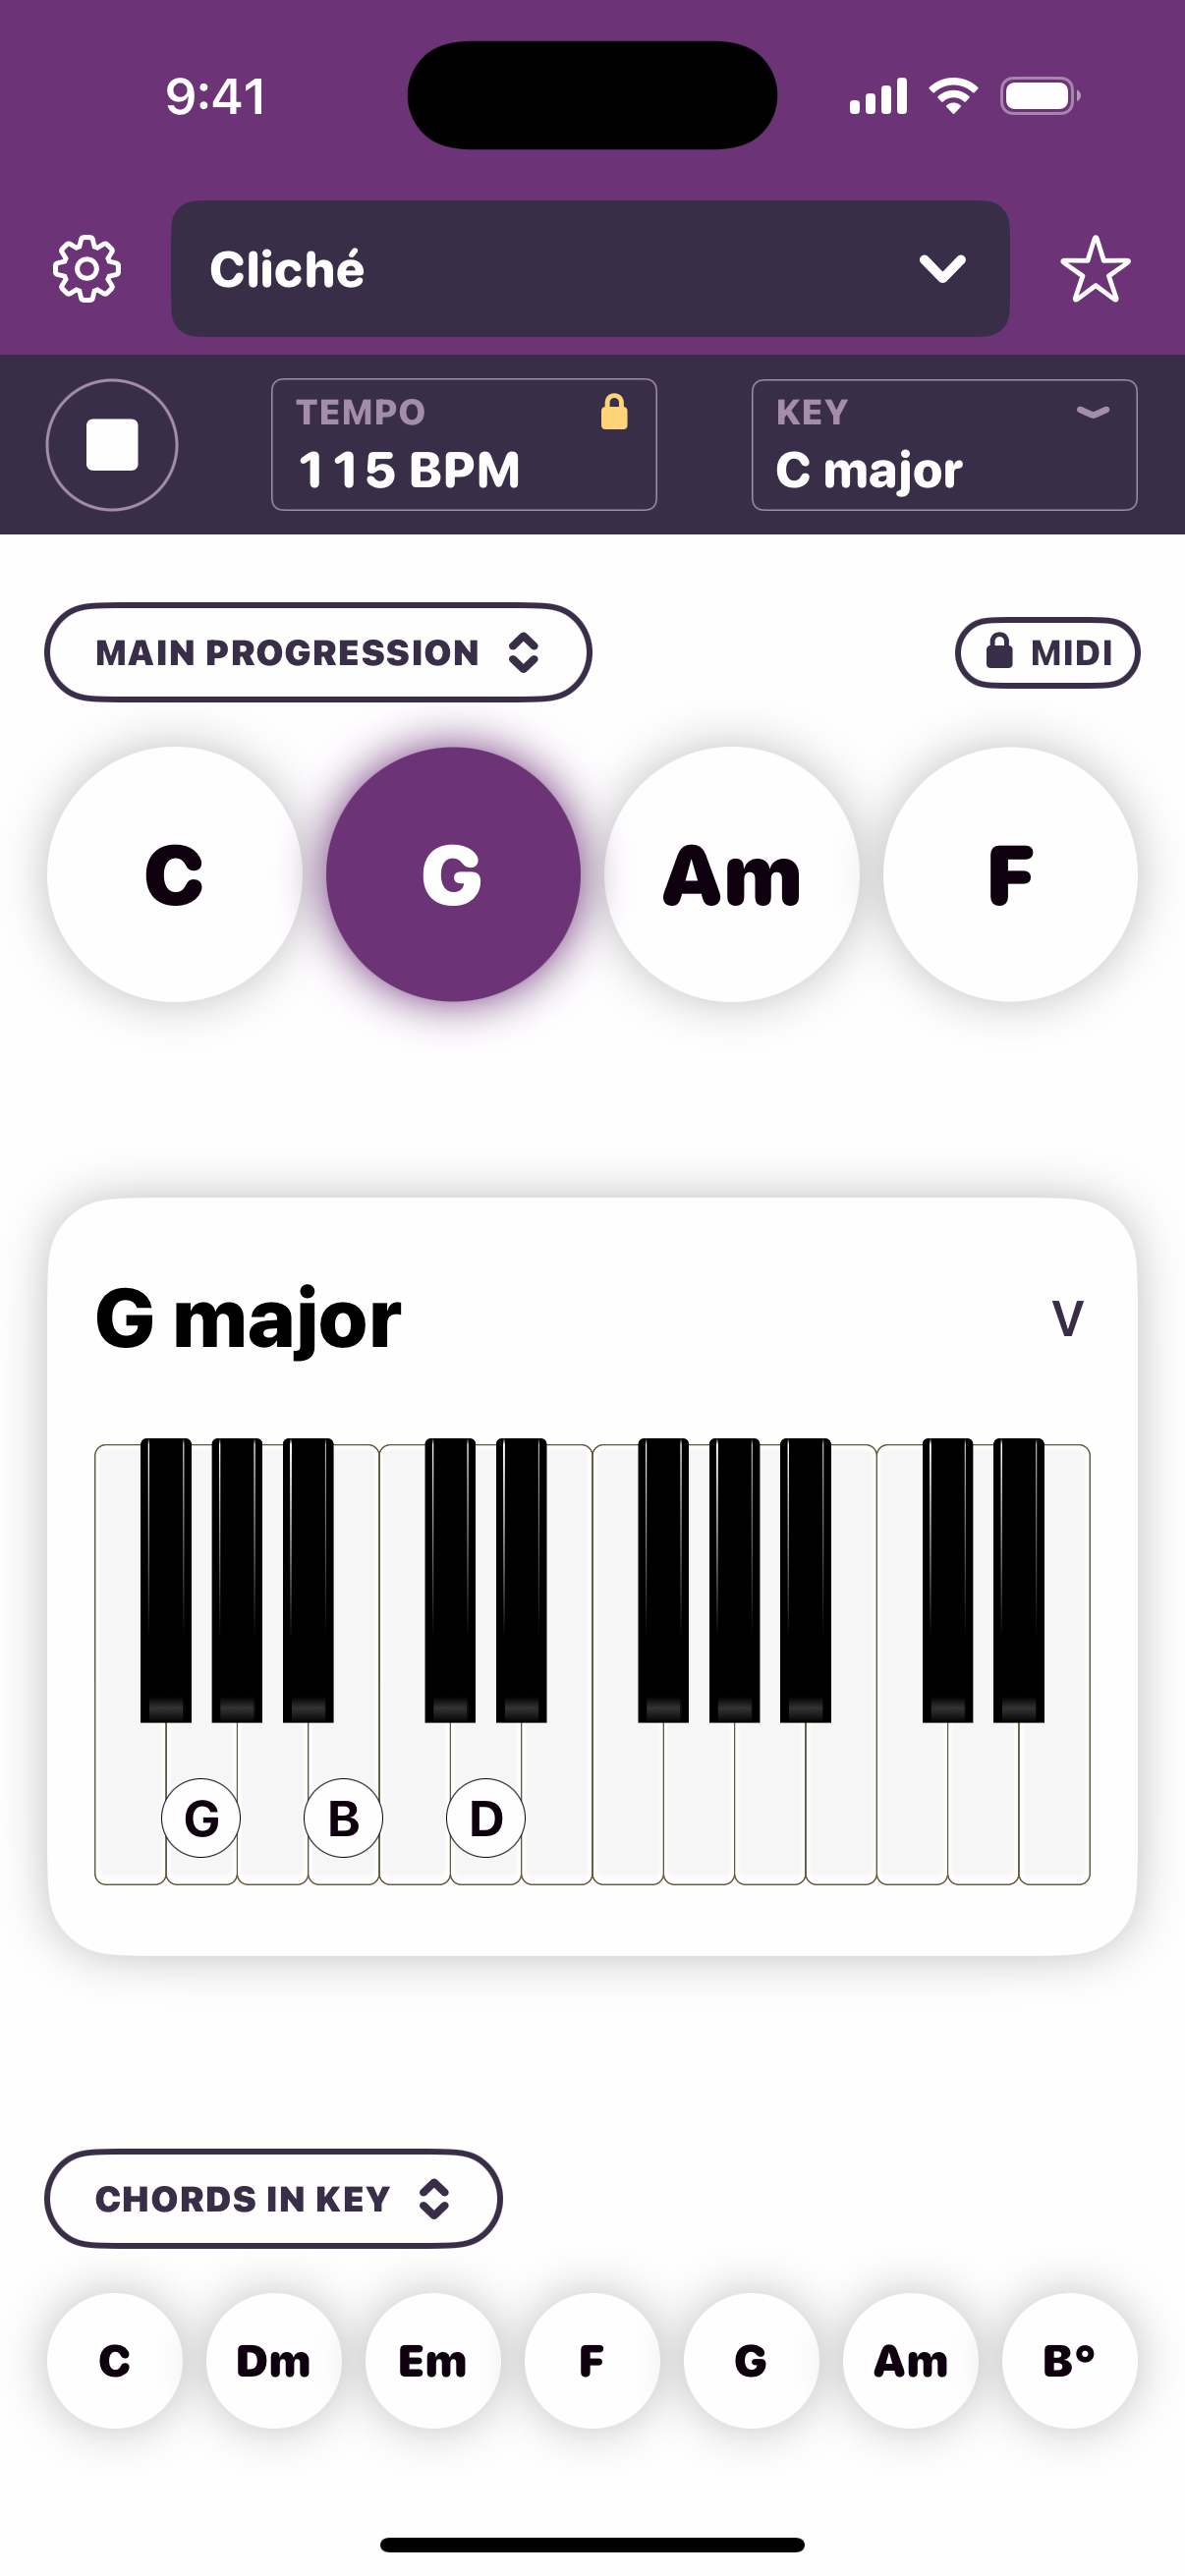
The main screen can show a chord diagram for any of the chords on screen. Tap one of the chord buttons to bring up the diagram.
With guitar or ukulele selected, a diagram shows where to place your fingers. When piano is selected, the notes for each key are shown.
Playing the progression
On the main screen tap the play button. As the progression plays, a diagram shows how to play the current chord on your selected instrument.
Accessing the settings screen
From the settings screen you can change the app’s behaviors and appearance.
To access settings, tap the settings cog icon in the top-left corner.

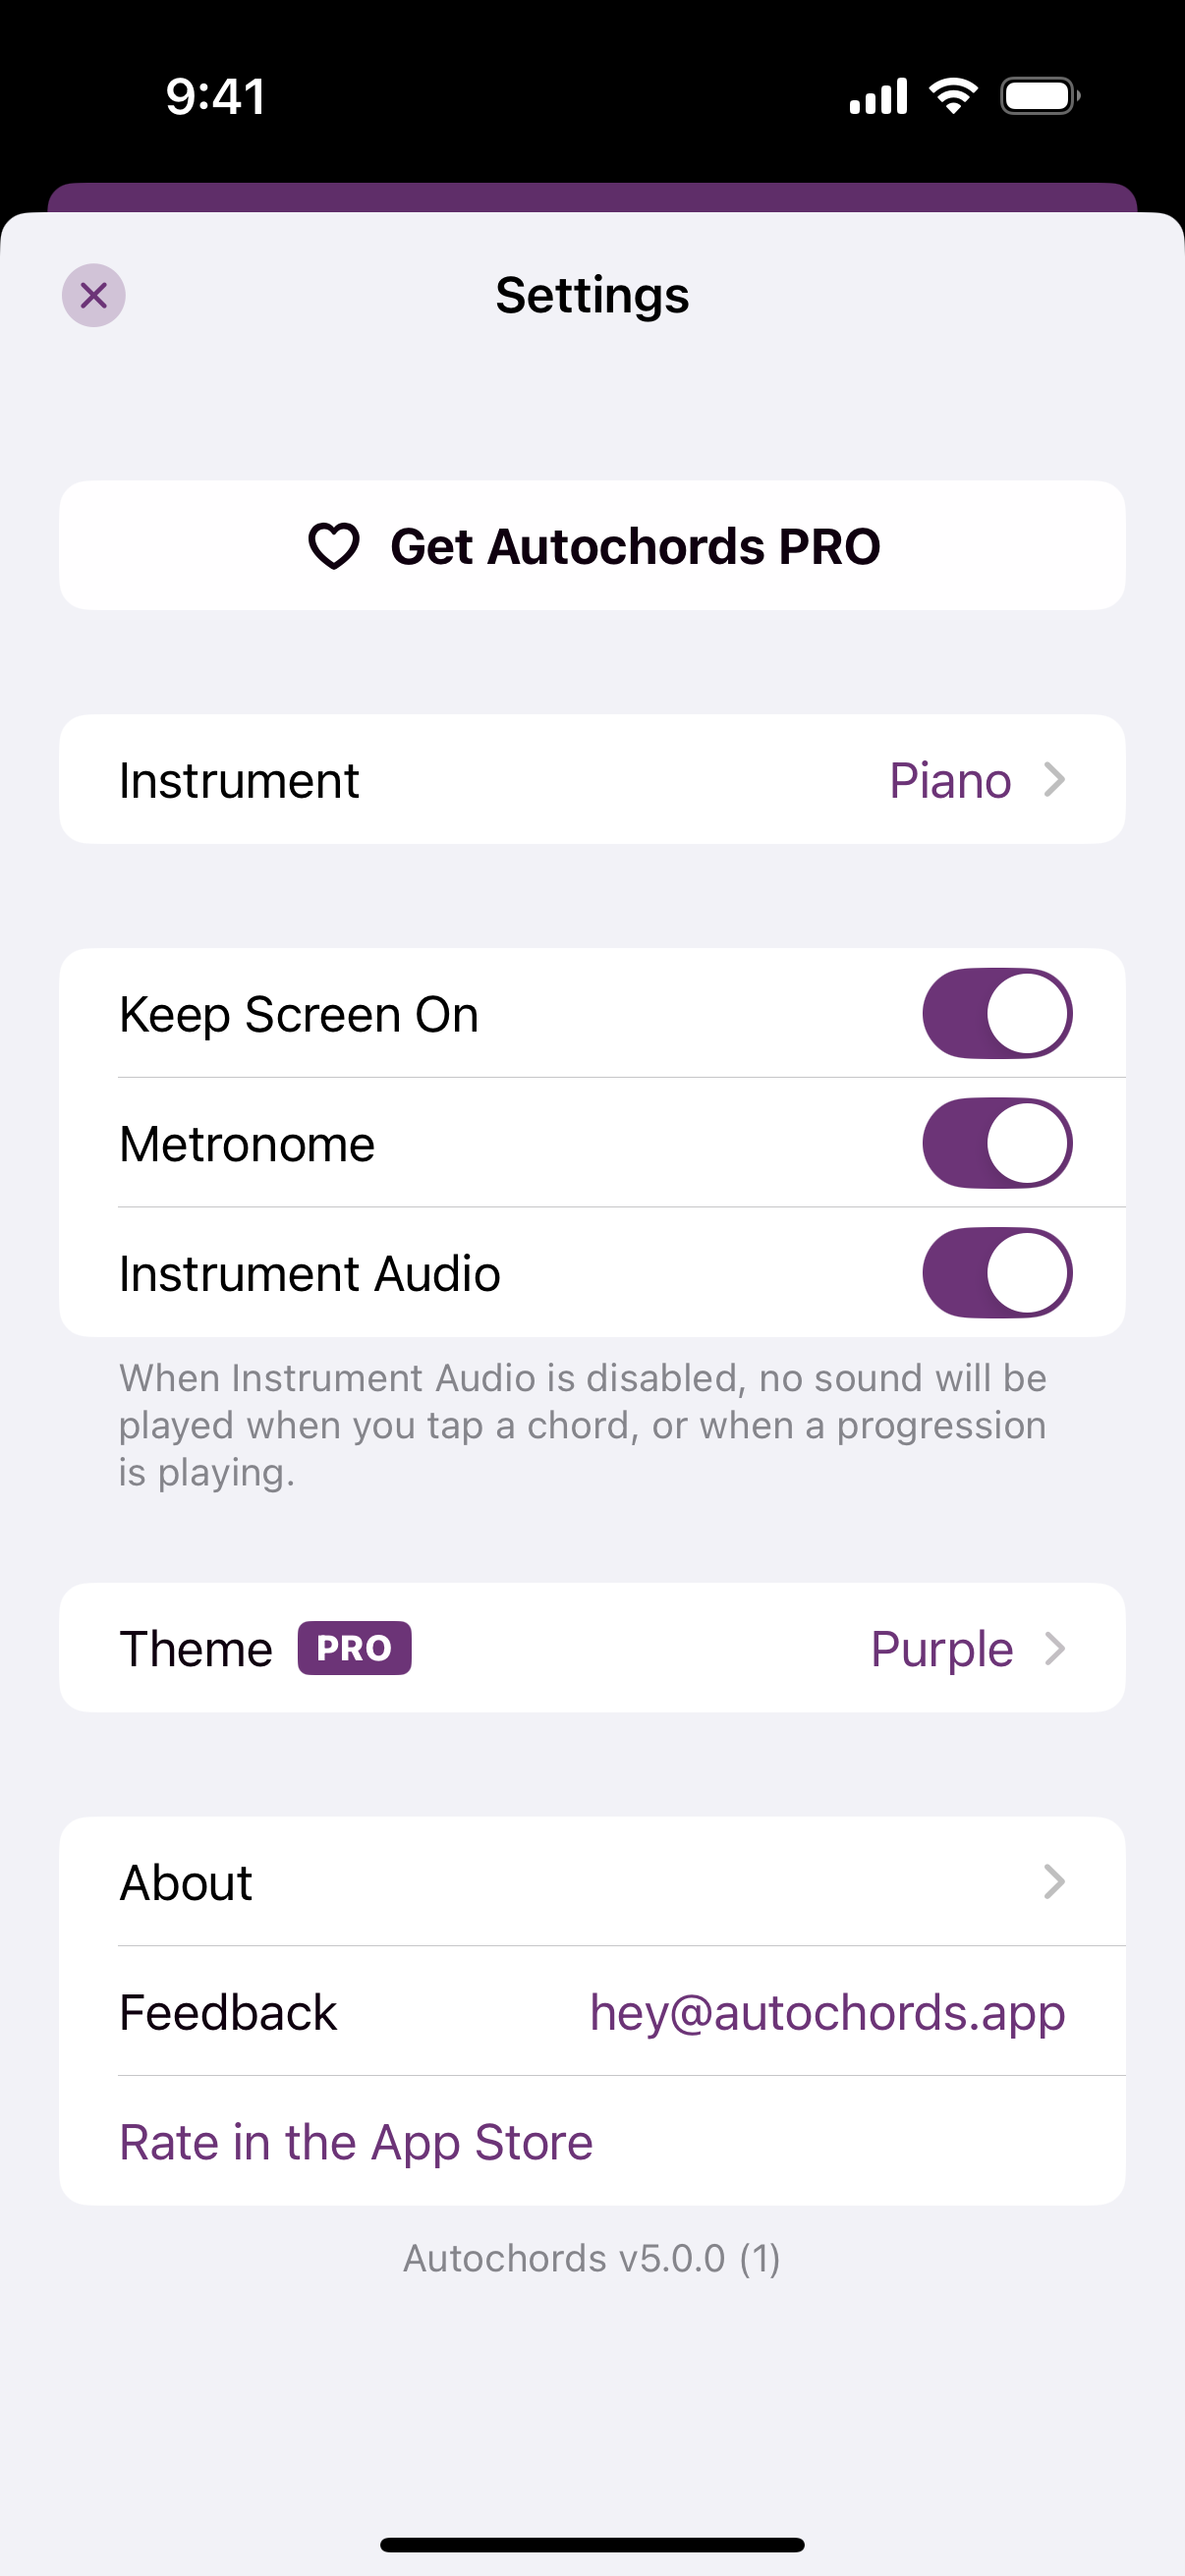
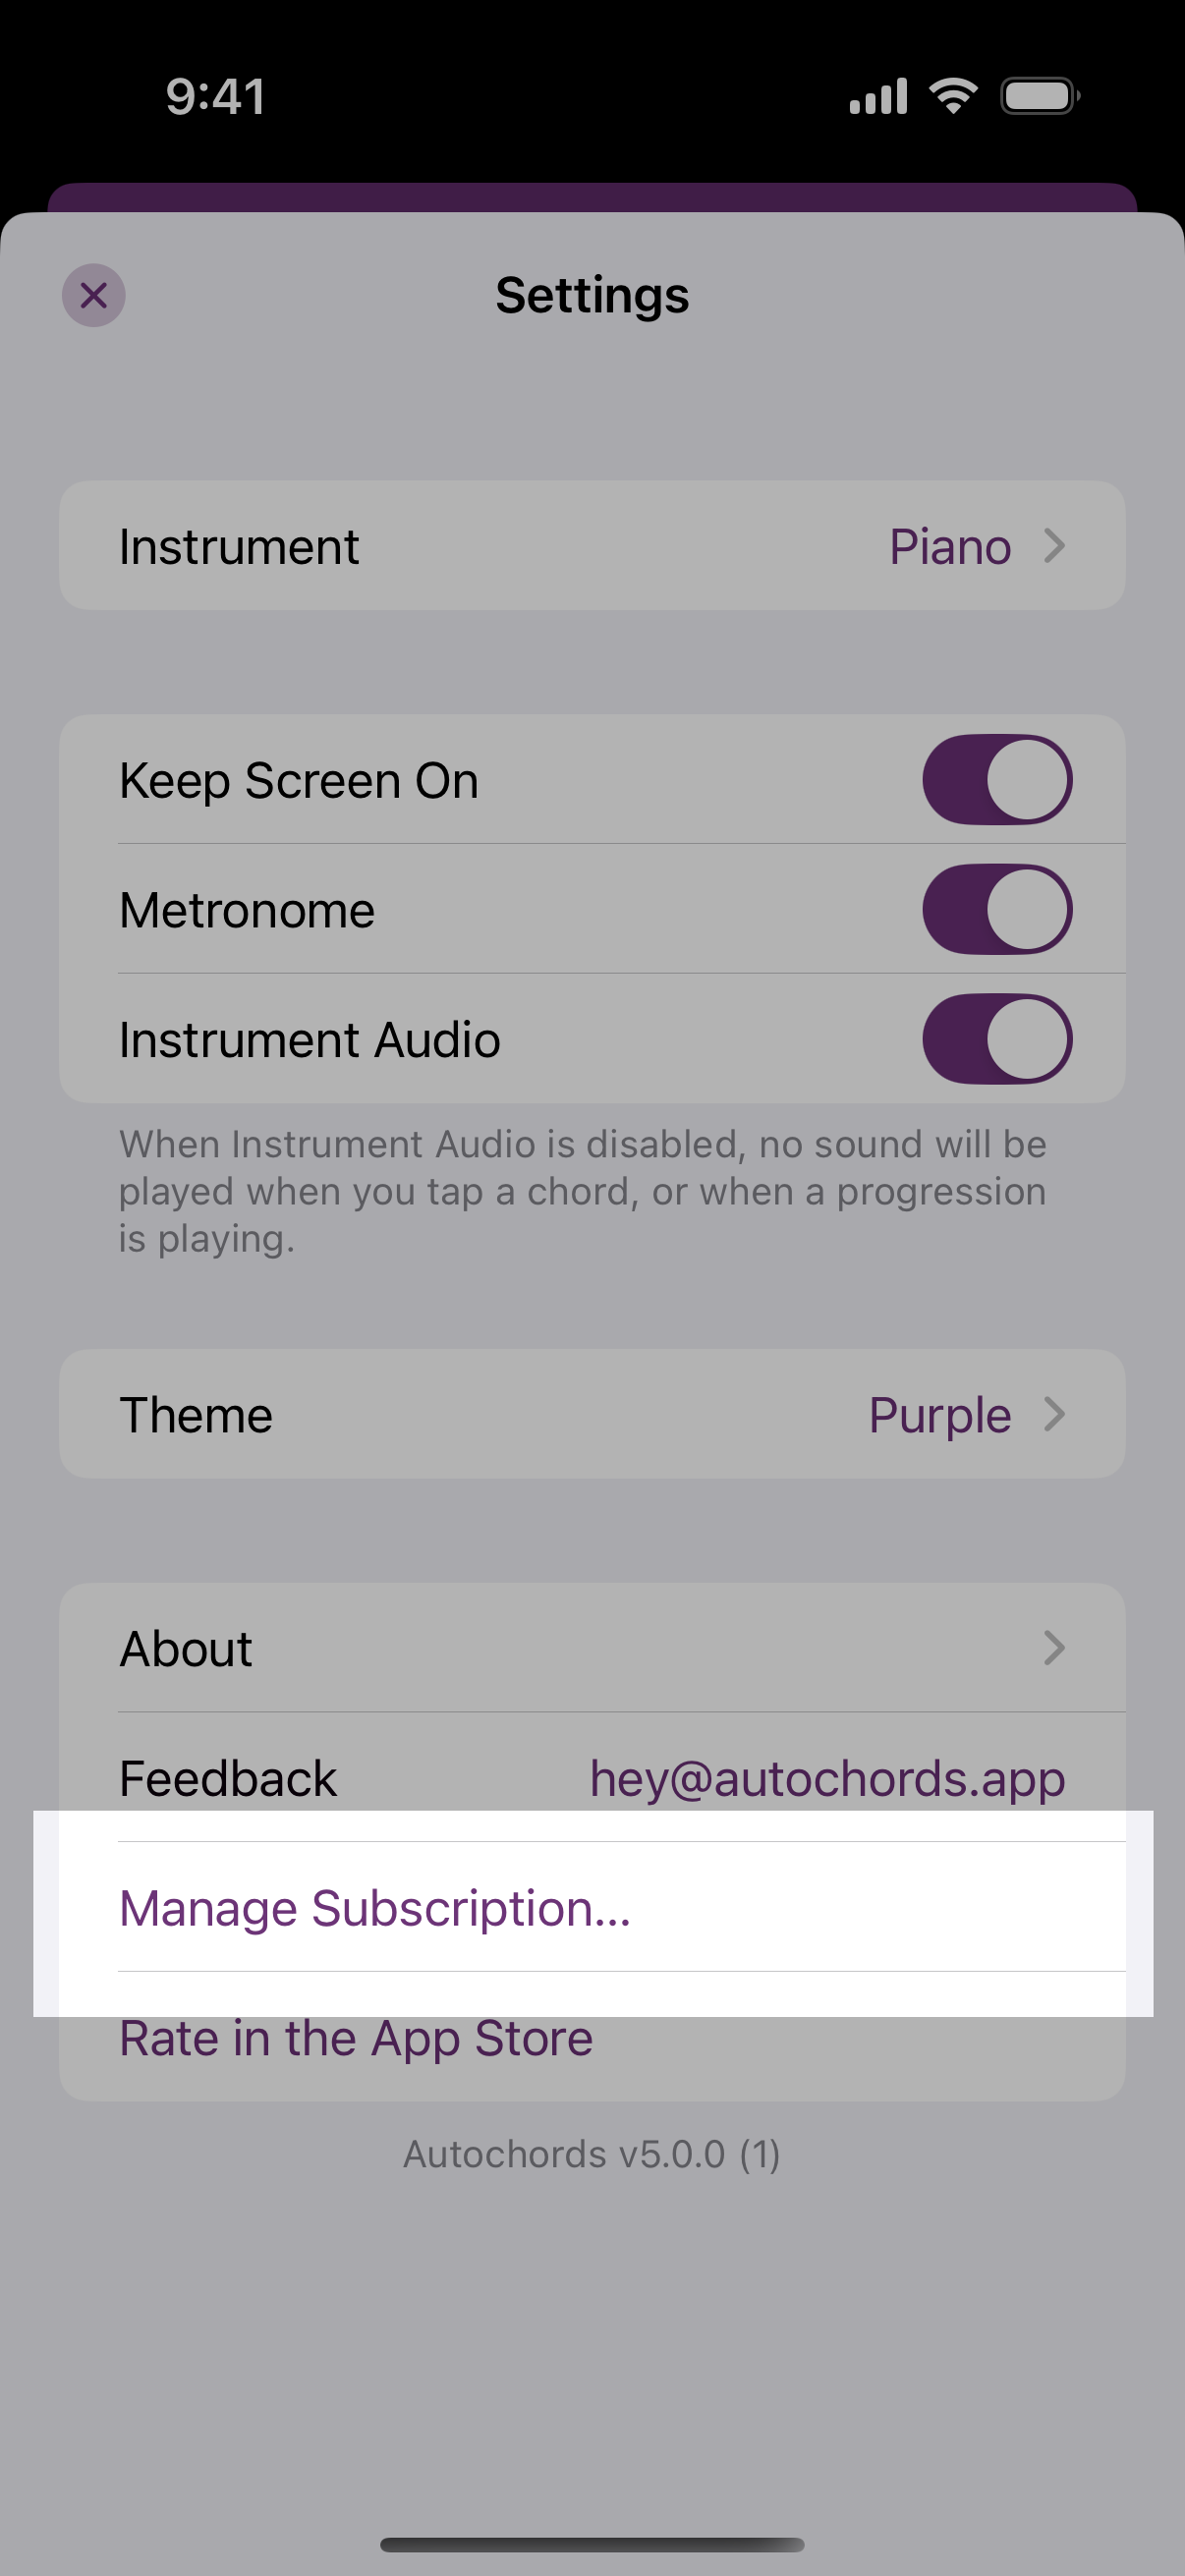
If you have an active PRO subscription, you can change or cancel it from the “Manage Subscription…” button.
Changing tempo (Requires PRO)
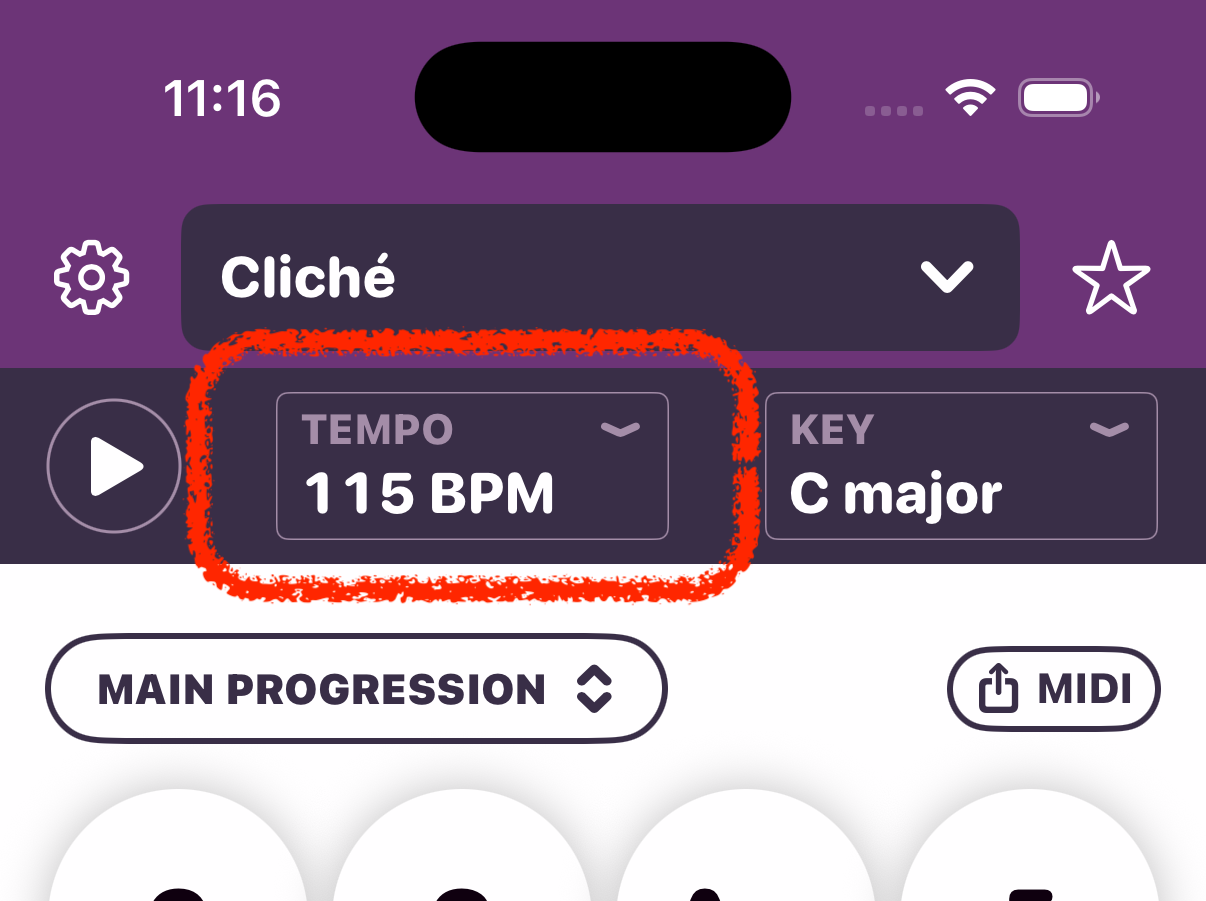
Tap the Tempo button to access to the tempo sheet.
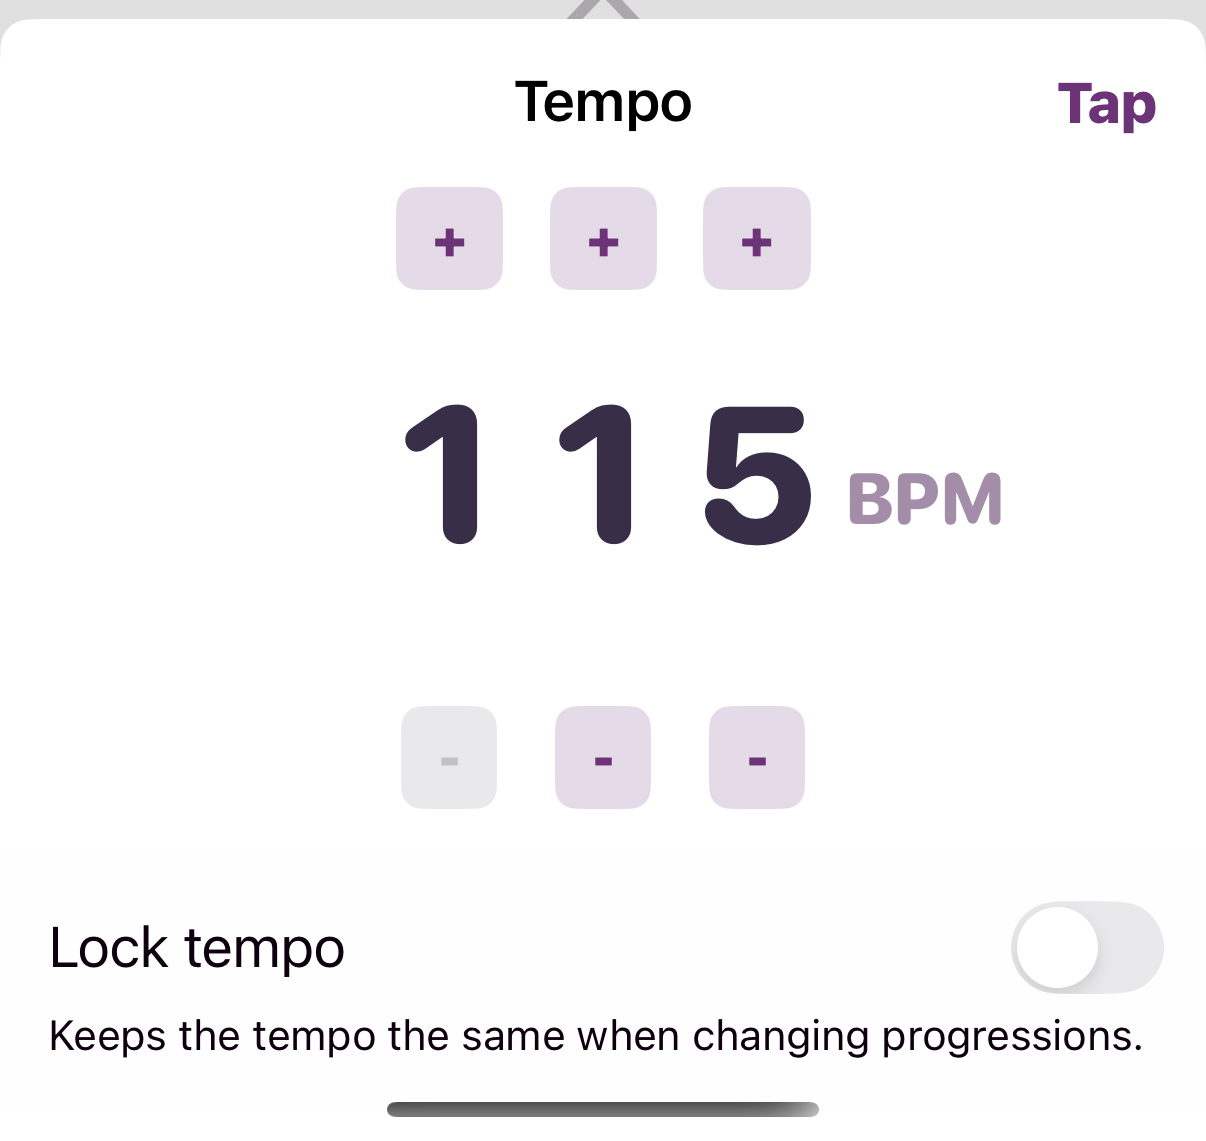
From the tempo sheet you can use the plus (+) and minus (-) buttons to speed up or slow down the chord progression.
You can also tap on the “Tap” button to set the tempo matching your own pace.
Lock tempo
When Lock tempo is enabled, changing progressions will keep the same tempo you've set. This is useful when you have a tempo in mind, but want to explore different progressions without changing the speed.
Adding favorites (Requires PRO)
The selected progression can be added to favorites by tapping the ⭐️ star button in the top corner.
If you made changes to the progression’s tempo or key, marking it as a favorite creates a copy as a custom progression, and the copy is marked as a favorite.
Managing favorites (Requires PRO)
If the selected progression is marked as a favorite, you can remove it from favorites by tapping the ⭐️ button in the top corner.
Otherwise, your favorites can be accessed from the progression picker sheet on the “Favorites” tab.
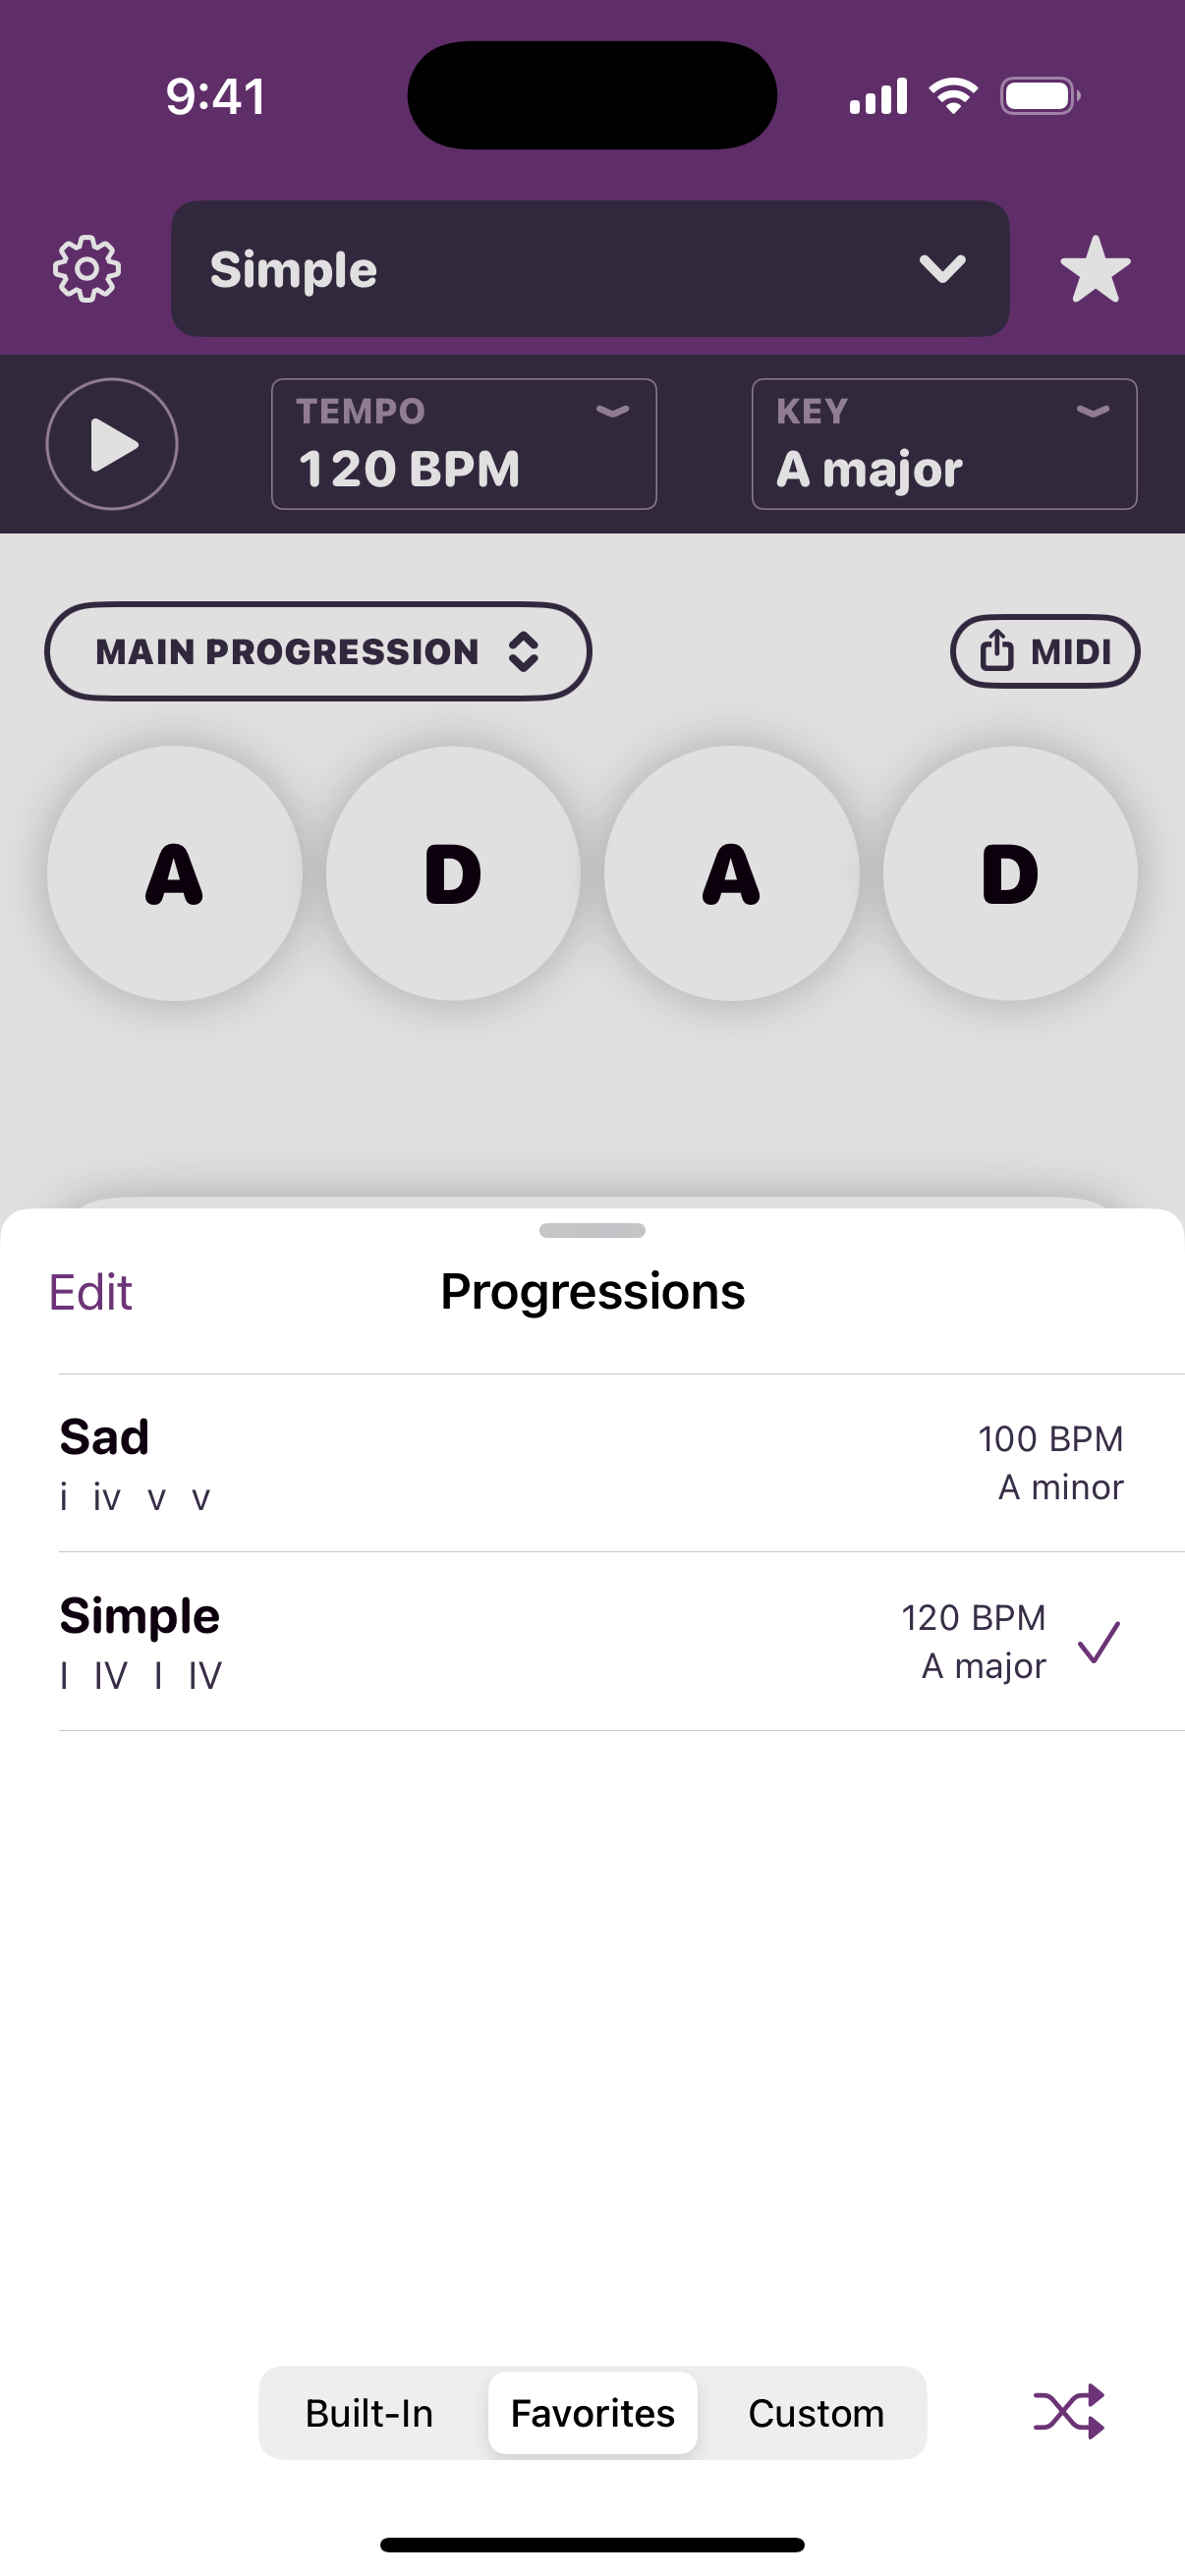
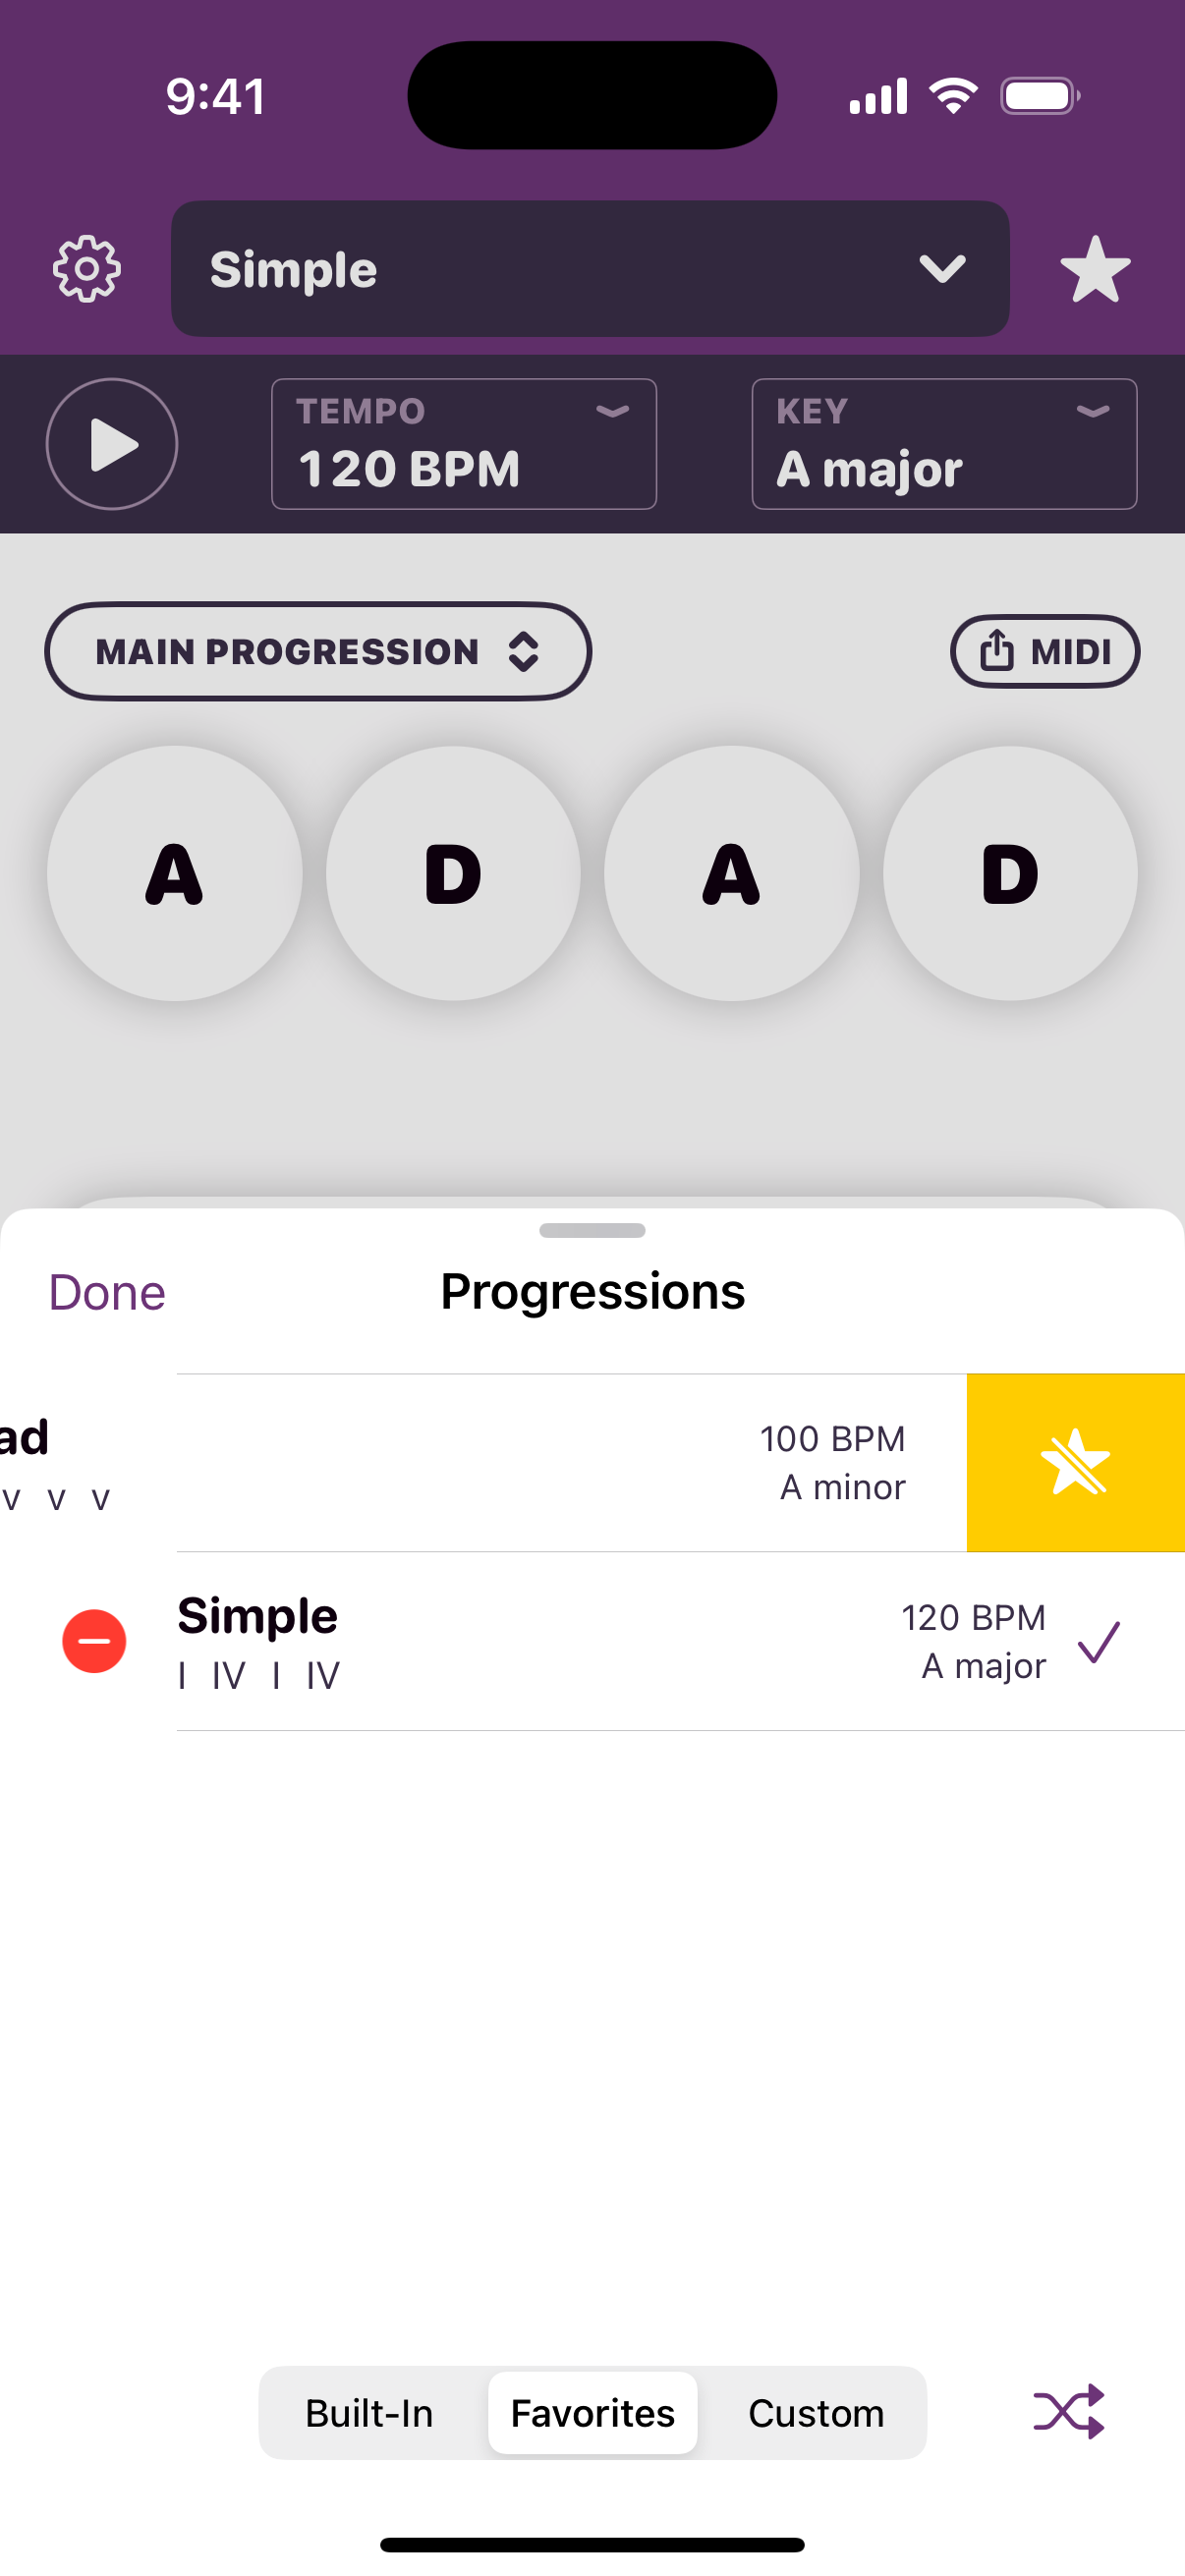
These can be selected just like built-in progressions. To remove a favorite, tap the Edit button, then the ⛔️ icon next to the progression you would like to remove, and finally tap the star with a slash through it.
Alternatively, you can swipe from right-to-left on a progression to remove it from the favorites list.
Creating a custom progression (Requires PRO)
From the progression picker sheet, select the Custom tab.
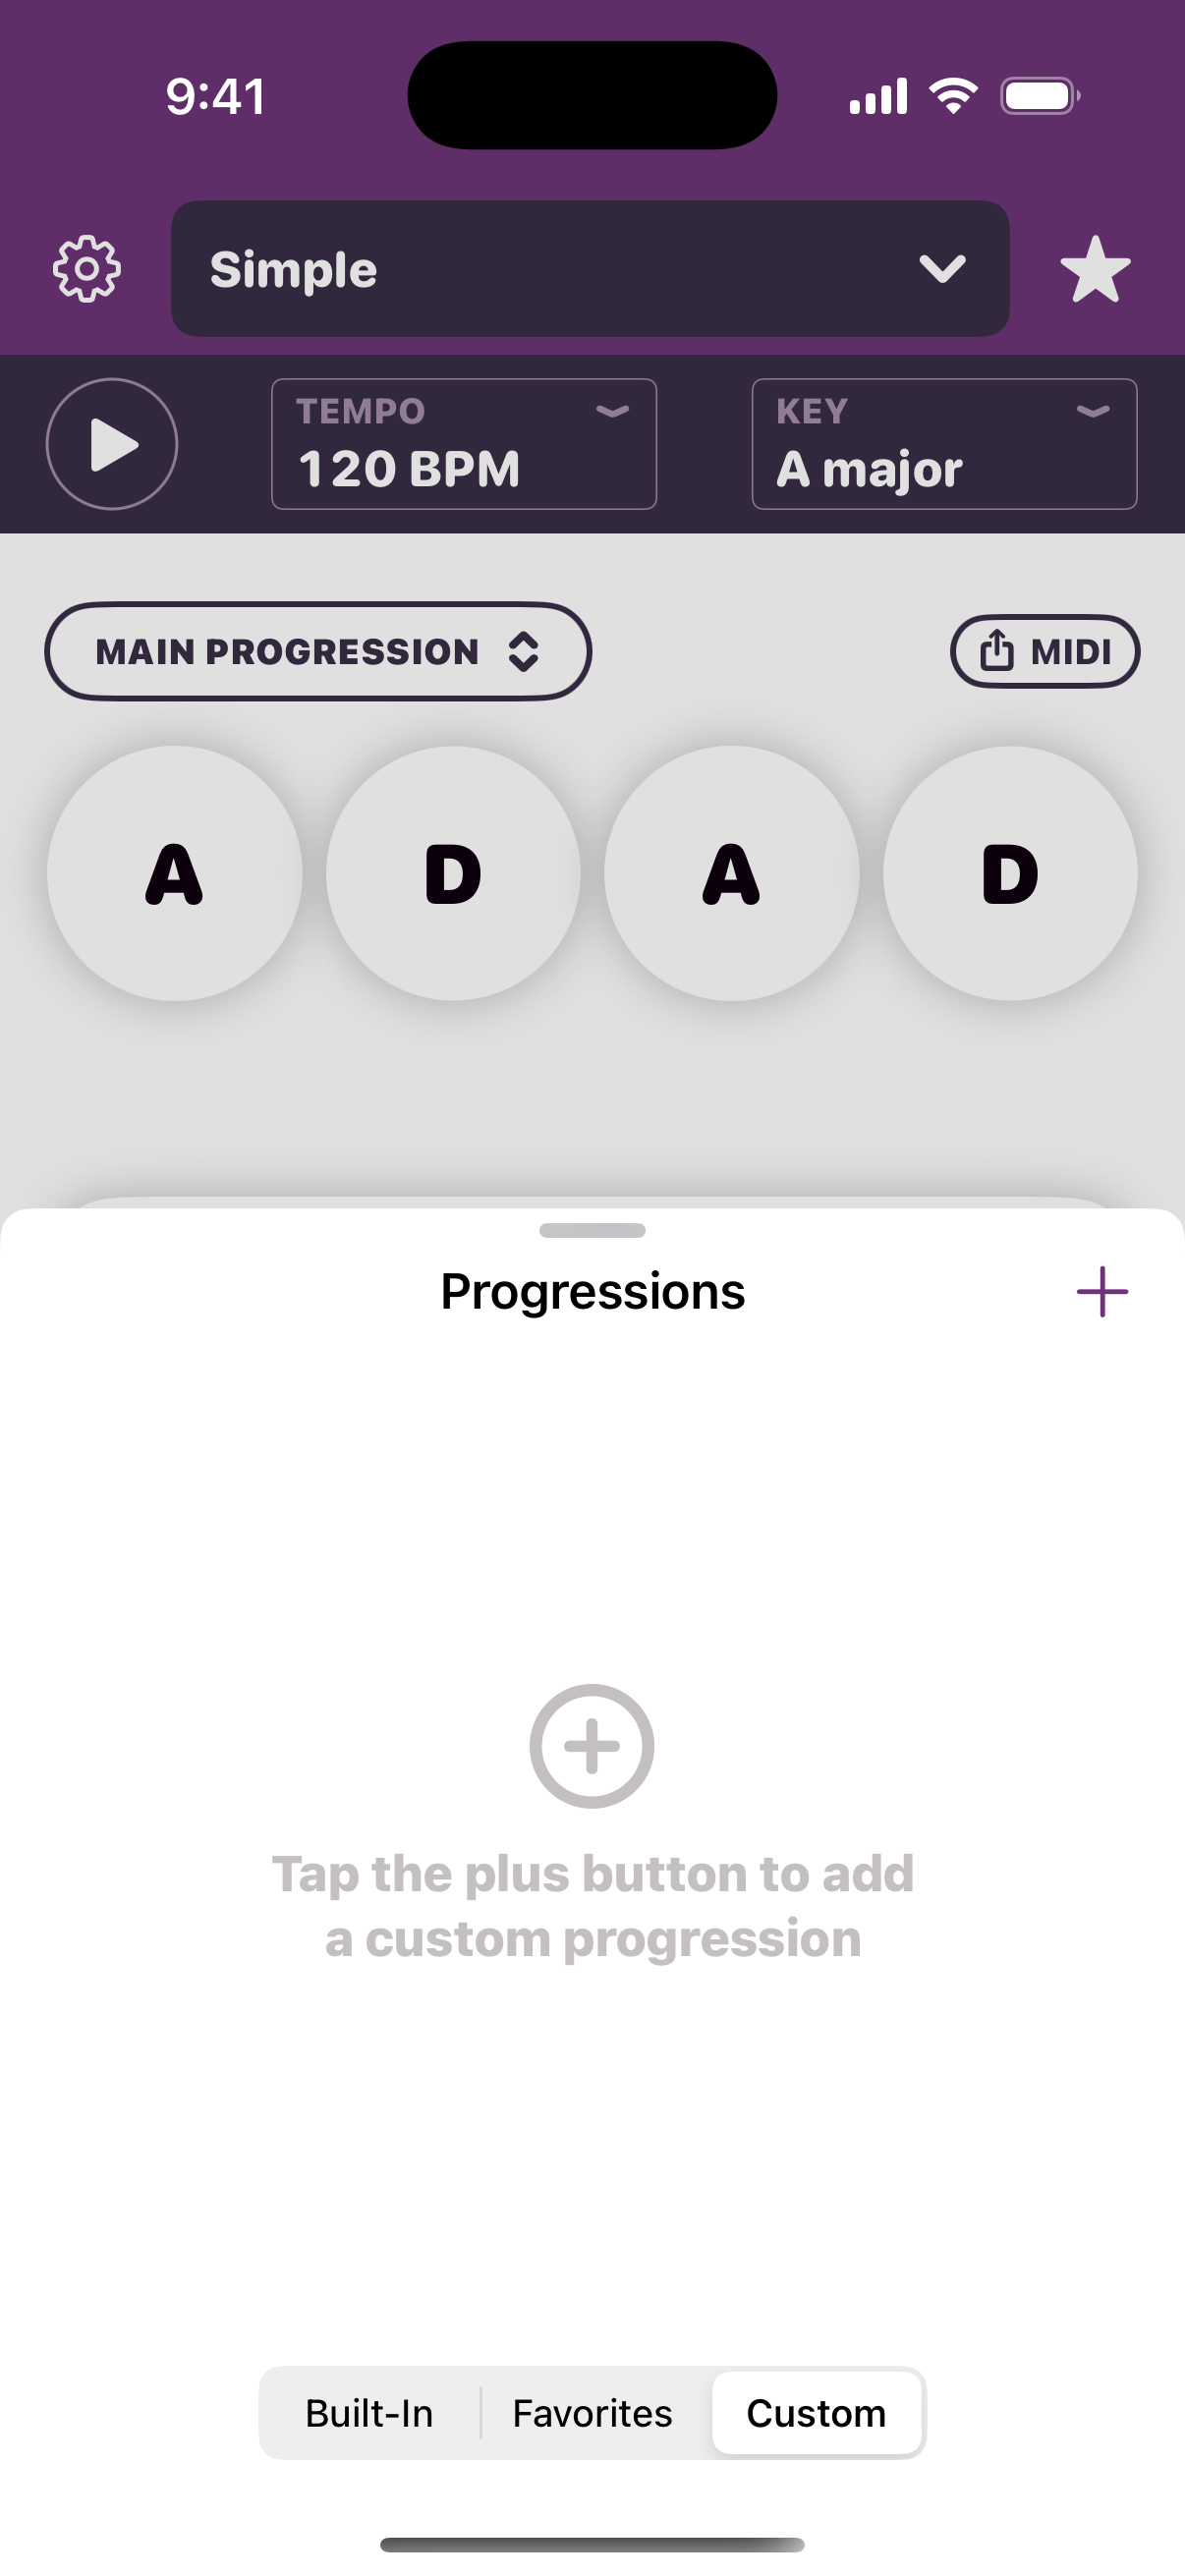
If you’ve already added any custom progressions (including adding a favorite with any variations), they’ll appear here.
To open the progression builder screen, tap the + button in the top-right corner of the sheet.
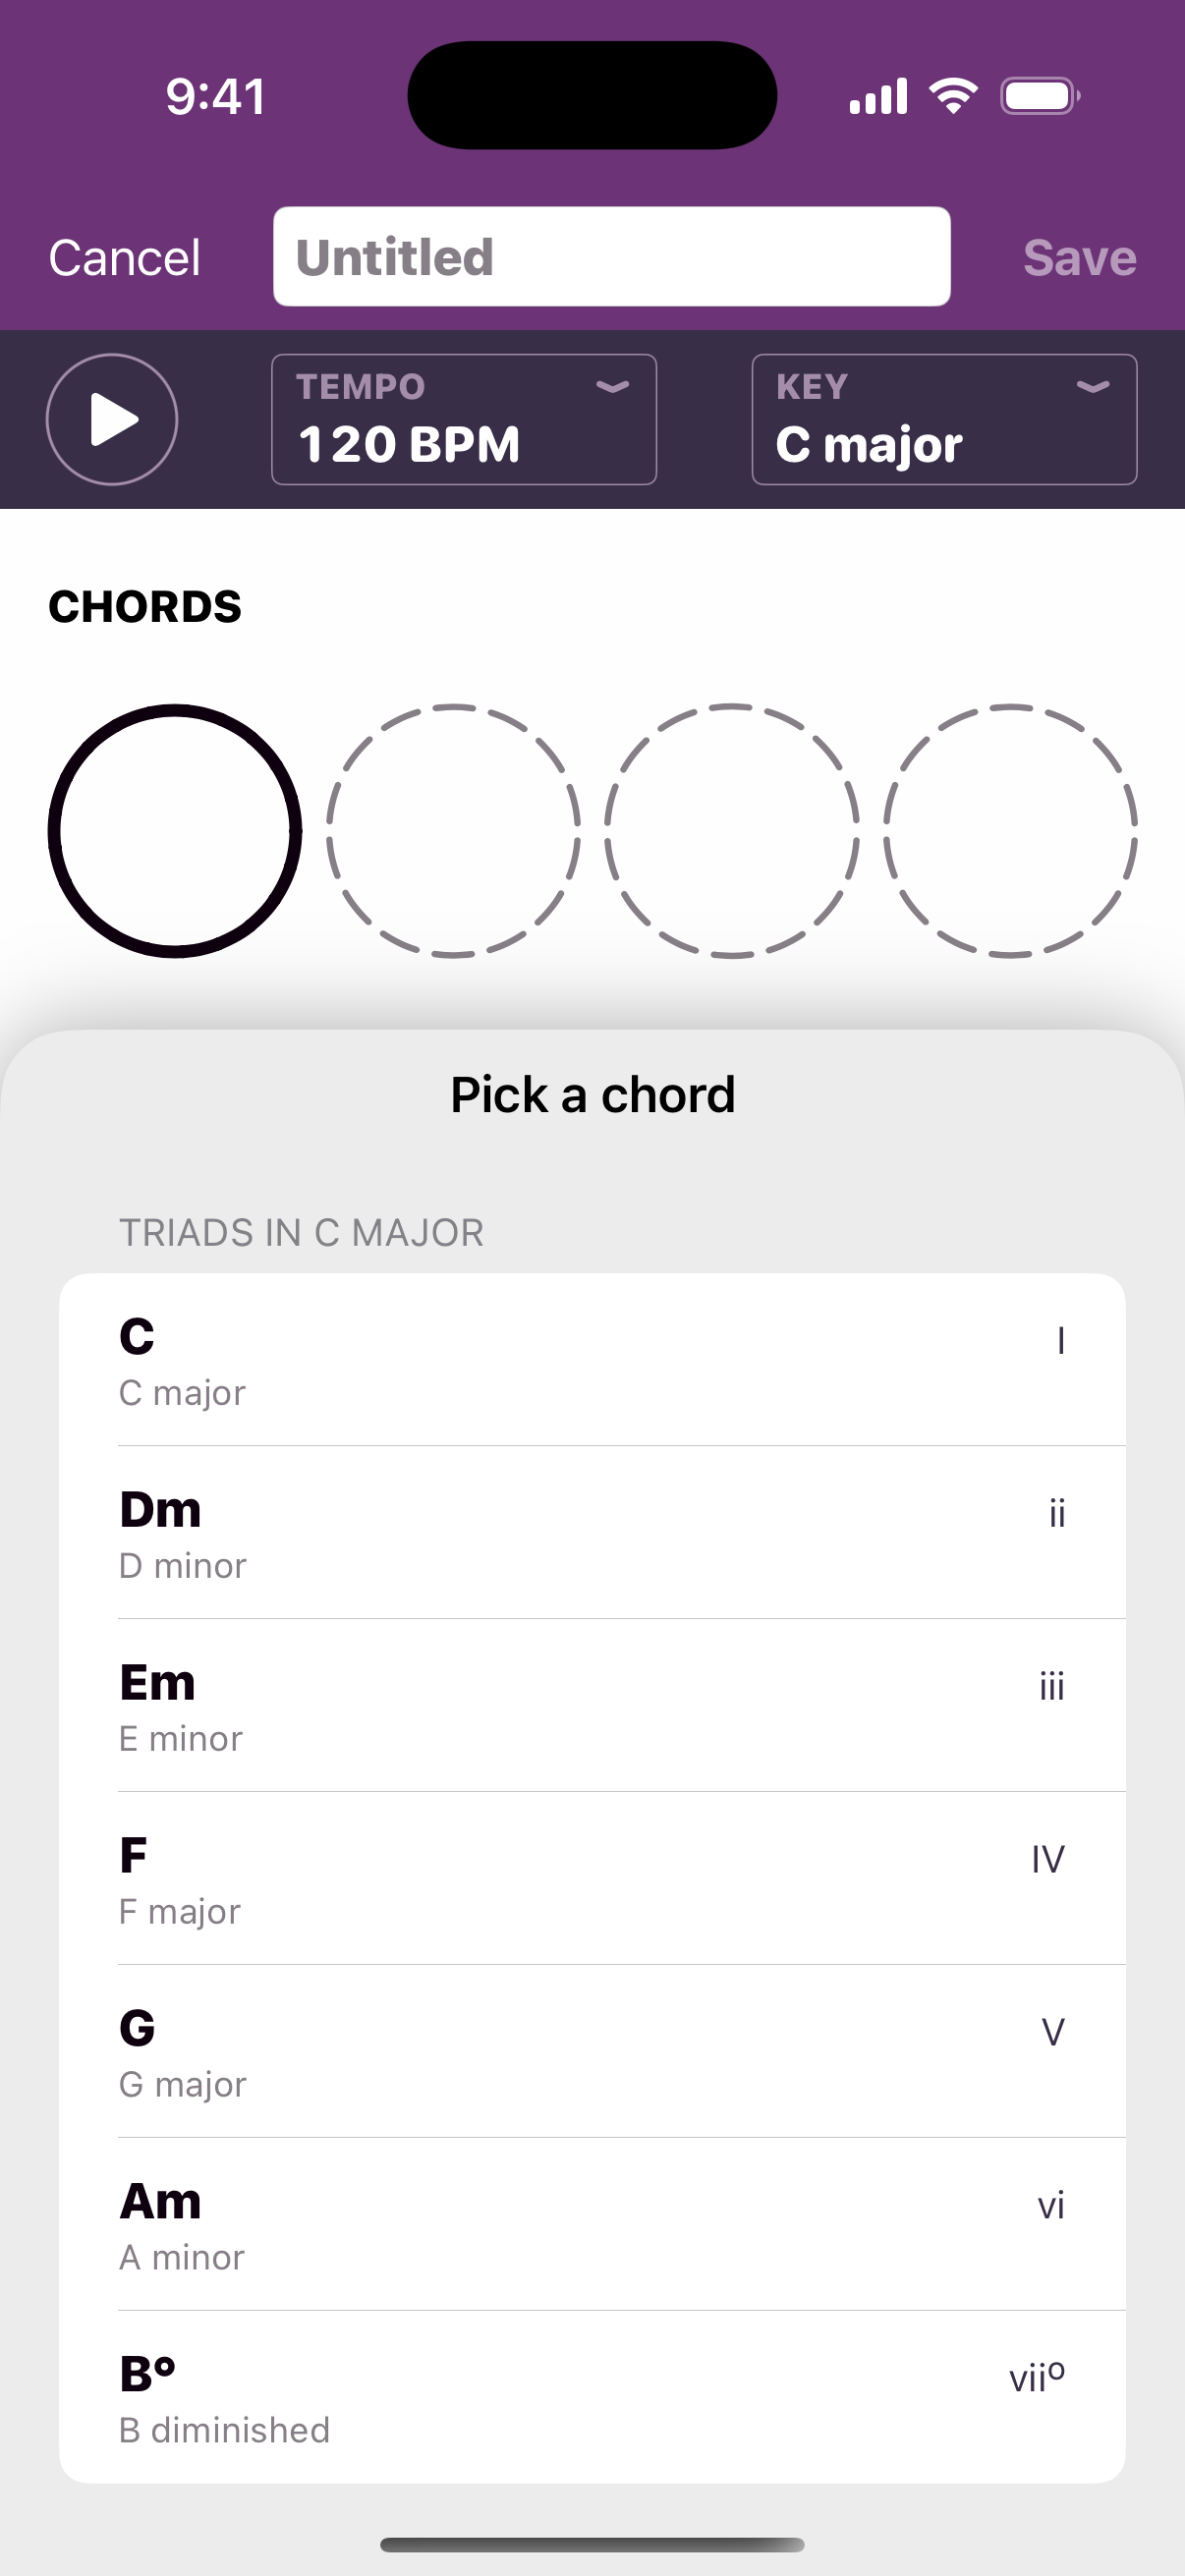
In the top bar, you can optionally enter a progression name.
Below that are options for setting the tempo and key for your progression.
And finally the screen has slots for entering the chords for your progression. With a chord slot selected, you can choose a chord to go there.
Changing the key will update the chords so they are relative to the new key.
When you’ve filled in the chord slots, the progression can be saved with the Save button in the top-right corner.
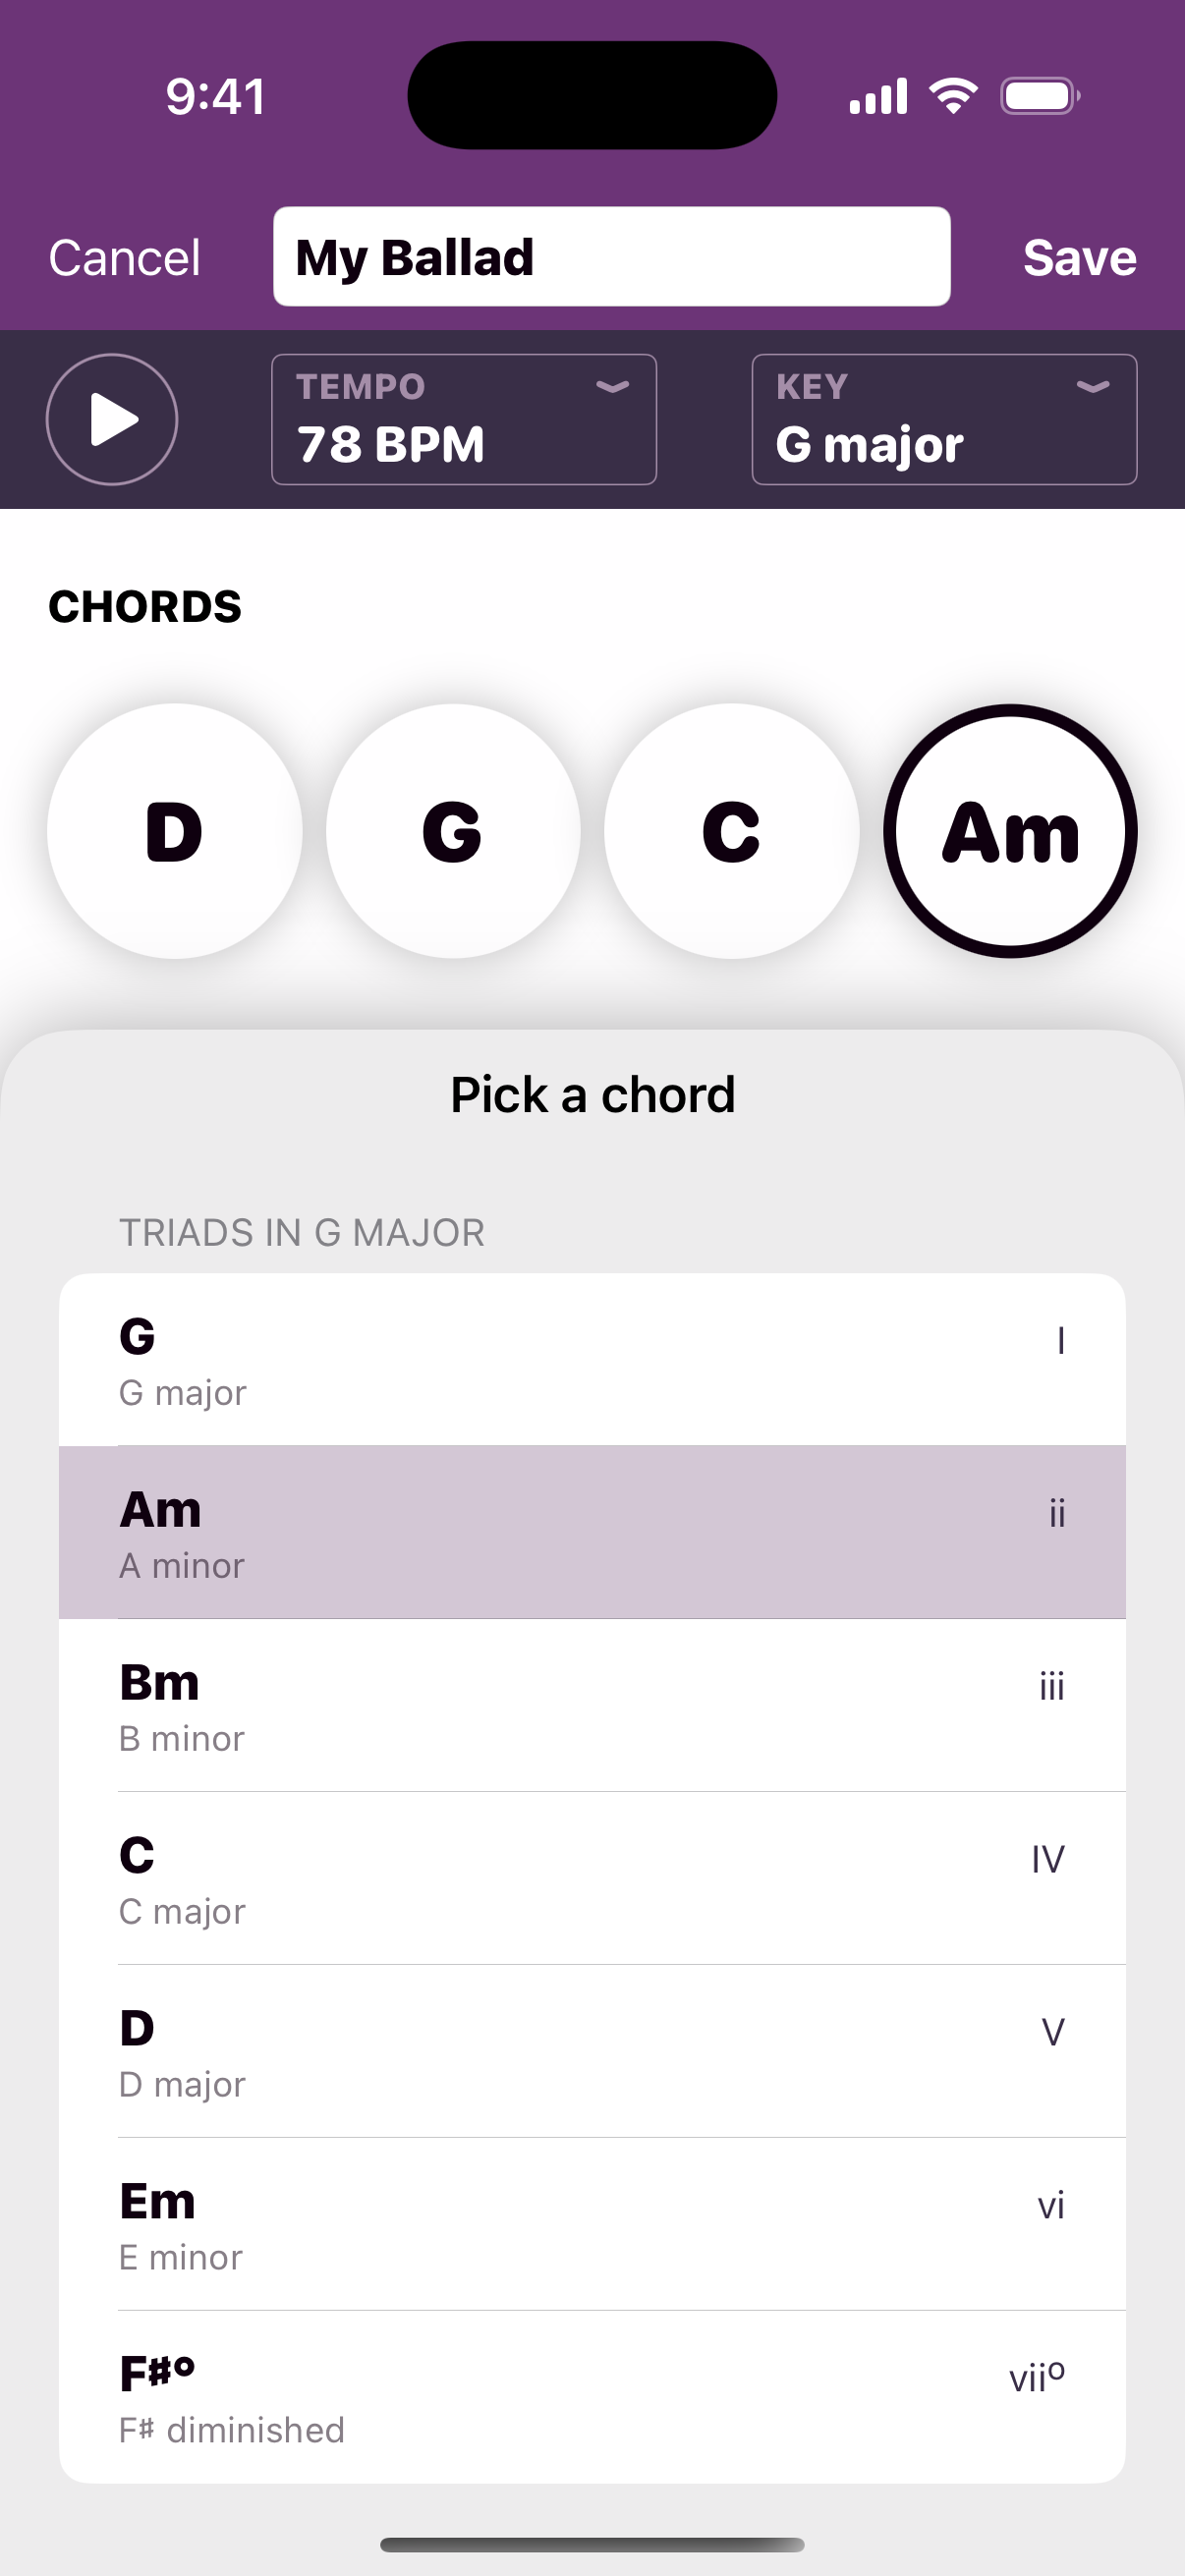
You can preview your progression by tapping the play button.
Managing custom progressions (Requires PRO)
To edit a custom progression, open the progression picker to the Custom tab, tap the Edit button, then select the progression.
The progression builder screen will open and you can edit the progression in the same way as adding a new one.
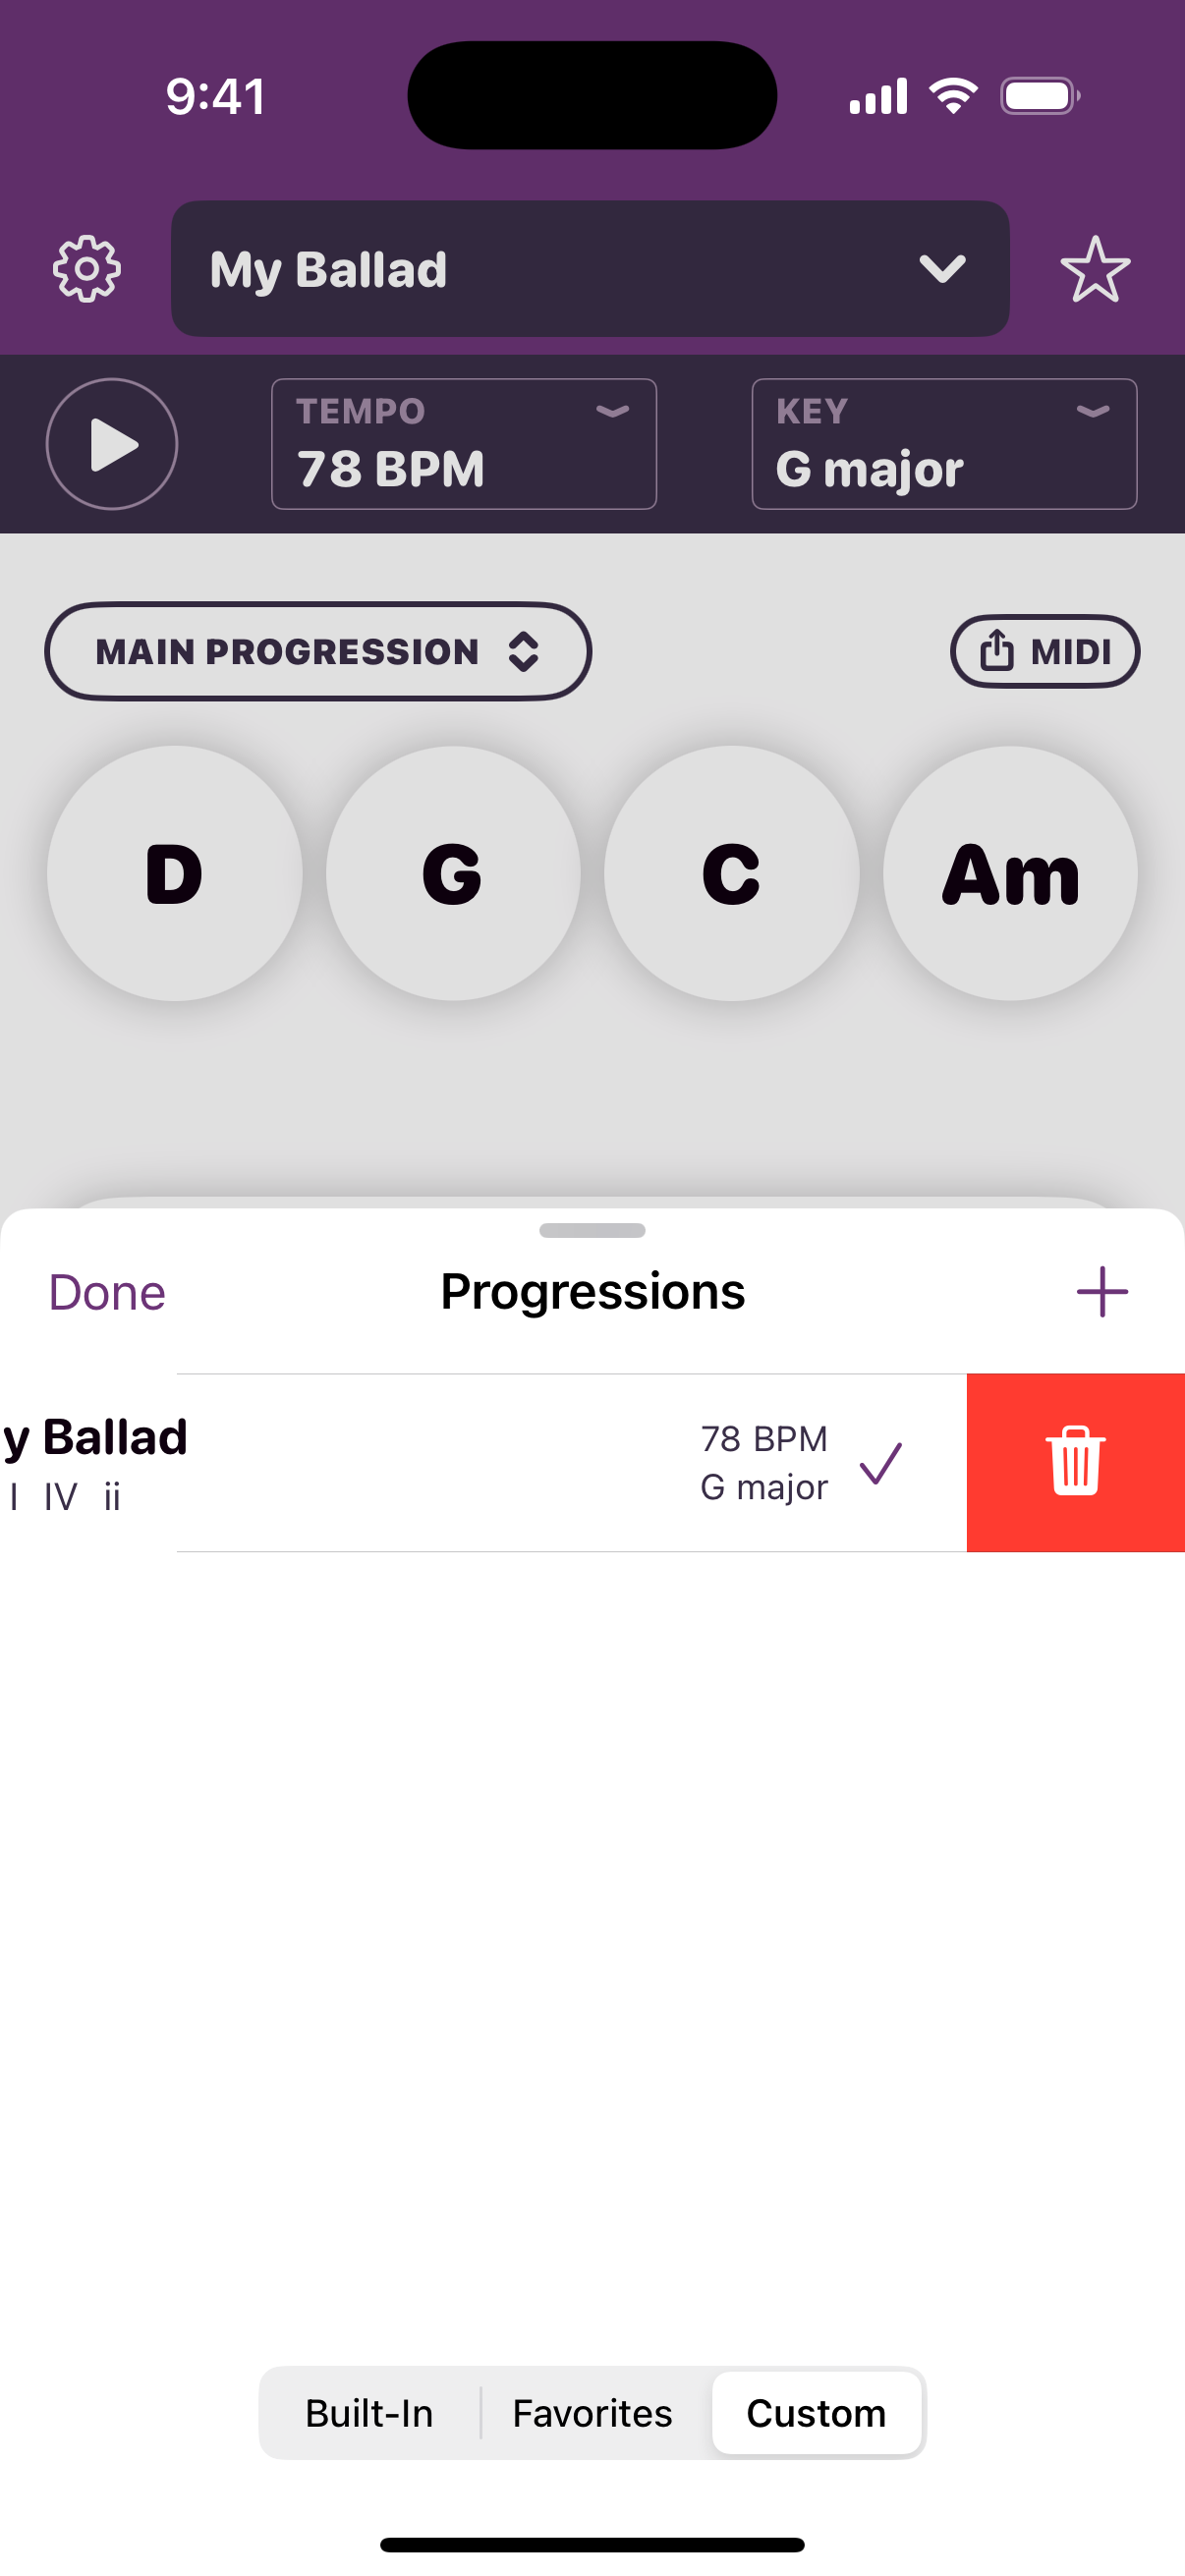
To delete a custom progression, tap the Edit button, then the ⛔️ button next to the progression, and tap the delete icon.
Exporting to MIDI (Requires PRO)
You can export a MIDI file for the active progression by selecting the MIDI share button. This opens a share sheet where you can open the “.mid” file in any app that supports it.
A common workflow is to export this MIDI file and open it in a desktop DAW (like Logic or GarageBand). Using AirDrop to transfer it to a Mac works great for this.
Note that the exported MIDI matches the selected instrument.
FAQs
What happens if I don’t renew my PRO subscription?
- You’ll still be able to access your list of favorite progressions but won’t be able to add or remove any.
- Custom progressions that were created when you had an active subscription will still be accessible, but can’t be created or deleted.
- If you changed the app theme while subscribed to PRO, it will revert to the default purple when your subscription ends.